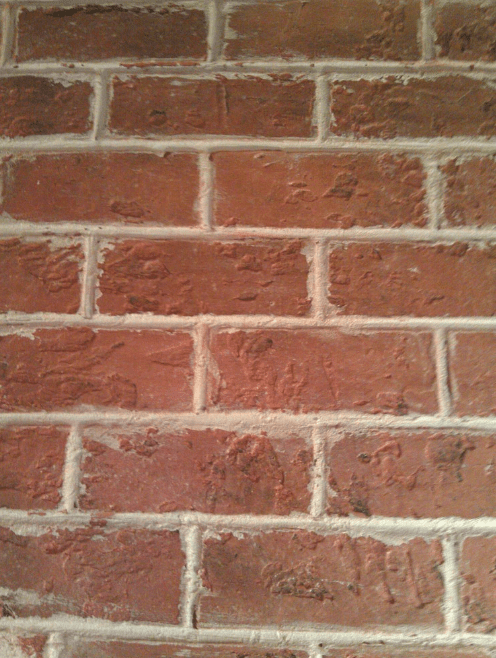
Have you ever wondered how someone with just a little paint can create these amazing brick-like faux finishes? You’ll be amazed at how you’re going to paint these faux brick walls. Faux Brick is one of the most popular faux finishes available today, for its timeless look. The best part about the faux brick paint technique is its relative ease of application.
Photo by MacGregors Designs & Fine Finishes – Discover home design design inspiration
With the right tools and direction, you can learn how to paint faux brick walls and murals in no time.
Materials & Tools
– Cream or grey color latex satin paint (base coat)
– Acrylic paint (one or two similar colors depending on desired look)
– Cellulose sponge, rectangular and roughly the size you want the brick to be.
– Craft paper
– Cellulose (or synthetic) sponge
– 1-inch brush
– 2-inch angled brush
– Cotton rags (lint free)
– Painters tape
Surface Preparation
The best surface for painting faux brick is a smooth surface. A careful surface preparation can make the painting part of the process easier and less stressful.
Wash the wall with soapy water and a sponge to remove any dirt or other contaminants. This is a very important step and should not be skipped. All walls, even if they look clean collect dust and oily buildup. Using a sponge mop, give all of the walls a vigorous wash, working in small sections so you can be sure you’ve covered the entire surface. Allow the wall to dry.
A smooth surface is very important to the finished look of the paint. Patch nails holes and other small surface holes or scratches with spackle. Allow several hours to dry and sand the repairs.
Steps to Painting and Faux Bricks Technique
1 – Apply a drop cloth to the floor beneath the wall.
2 – Priming: Priming is a very important step, as it gives you a clean, paintable surface work on. Paint two coats of primer onto the wall using a paint roller. Allow each coat to dry fully.
3 – You should tape off windows, doors, floor trim etc.
4 – The best way to start is by painting a base coat that will be your brick mortar color. That’s the lines between the bricks. Allow the paint to dry, and then apply a second coat if needed.
5 – Stamp a darker beige color onto the wall with a sponge. This will create a mottled texture, resulting in more realistic mortar. Allow the paint to dry.
6 – Next you will tape off your brick pattern. Using ½ inch blue tape, you’ll line off what will end up being your mortar lines.
7 – Applying the Faux Technique Glaze: After you’ve taped off the wall, you can paint the main color of your brick over the wall and the taped mortar lines. Brick varies in color and many colors can be found in the same brick at times. So the first step really, is choosing the exact brick you would like to copy. However, bricks come in many shades of red, brown and tan.
a) Start at a top corner and stamp your cellulose sponge onto the wall. Add some light pressure. Adding too much pressure will cause the paint to run down the wall and take away from the textured look.
b) Take care not to saturate the sponge. This may also, cause the paint to run when you press the sponge onto your surface.
c) Sponge a darker brick color lightly over the entire wall for added texture, then more heavily over some bricks to create a true illusion of an exposed brick wall.
d) Once you have finished stamping all of your full-size bricks, cut the cellulose sponge into two halves. Use these smaller pieces to finish the corners where you can. If some areas need an even smaller piece of sponge, simply cut one of the halves into the size you need.
e) Allow the paint to dry.
f) When the brick has dried, take the lightest yellow-brown, mix it with white and a little glazing, and take a big brush. This brush will be used to add highlights. The most important is: putting on very little paint.
g) You may add hand paint fine cracks and chips onto some of the bricks if desired.
8 – Remove the tape from the trim-work, ceiling, and any adjoining sections while the glaze is still wet. Be careful not to mar your beautiful new brick faux finish.
9 – Carefully remove the painter’s tape, exposing the mortar lines.
Small Family Homes with Stylish Interiors (howtobuildahouseblog.com)

