A gambrel roof is often associated with barns or with colonial styled houses and traces its origins to the European settlements in Indonesia which were later carried to the United Stated of America. This particular style of roof has sloping roof with the upper slope at shallower angle and the lower slope at the steeper angle.
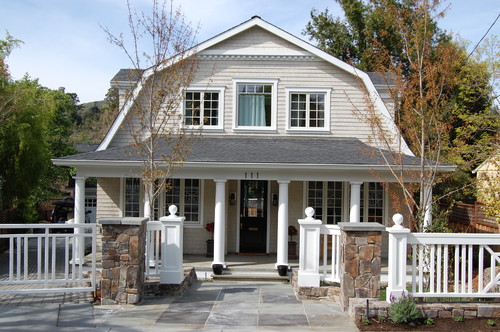
Photo by PatriARCH Architecture – Discover exterior home design ideas
The upper angle is at thirty degrees whereas the lower angle is at sixty degrees.
The advantage of this style is that it offers increased storage space under its steeper sides and because of that gambrel roofs can be found on many barns.
Gambrel roofs are not really difficult to build. In fact, they are called do it yourself roofs for their ease of building. They can be built using light weight wood.
Planning Your Gambrel Roof
1. First determine the space and height of the building.
2. Determine the number of trusses you need for your gambrel roof according to the size of the building you are constructing. The spacing between roof trusses is 16 inches on center.
3. Decide how tall you would like to make your gambrel roof. For example:
a) A 36-foot-wide building may have a 10 foot 4 inch high ceiling (measured from the interior)
b) A 16-foot-wide structure may have a 5 foot 2 inch high ceiling.
Remember, the upper section of a gambrel roof has a 30-degree angle, whereas the lower section of the roof has a 60 degree angle.
4. Choose whether or not to purchase your roof trusses pre-made or to make them yourself on site.
Layout and Construction of Trusses
In case you wish to go ahead and make the truss on your own, follow the following steps on how to build a gambrel roof:
1. Purchase the lumber you will need to make the roof trusses. 2-by-6 inch lumber works well, and is available at any building supply store or lumber yard.
2. Find a level section of ground and make a nice big area of plywood to work on, you can snap out clean chalk lines for your guides, and use a drill to screw each piece solidly in place as it’s being cut and fitted.
3. Lay out the lumber pieces in the pattern determined and use chalk marks to note the points where cuts would be required.
4. Make the required cuts and then use these pieces as templates for cutting out the other pieces.
5. Cut enough pieces for trusses to be installed on 16-inch centers. Use 0.5-inch (12 mm) plywood to make brackets for securing the pieces together.
6. Assemble the roof trusses using the .5-inch (12 mm) plywood that you cut for straps. Use the stakes driven into the ground to keep the lumber in place until you are able to secure it together.
7. Attach the braces to all of the trusses joints using 8 penny nails. Should you wish to reinforce the joints still further, by tying them together with metal strap.
8. Finish the truss by securing a 2-by-6 inch board between the dogleg braces. This will act as a joist and a stiffener.
Advantages and Disadvantages of Slate Roofs (howtobuildahouseblog.com)
Raise the Trusses
1. Lift the trusses into position, plumb them and secure them into a strong position while you make the gambrel shaped roof. Install the trusses, nailing with 16 penny nails, starting from either end of the building. You will begin nailing to the floor or ceiling joist. Plumb and square up the trusses as you install using scrap 2 x 4-inch wood (5 x 10 cm). Keep checking that they remain plumb.
2. Secure a temporary brace in between each truss as you build a gambrel roof. This brace will help to keep each truss straight and true. You can remove it before adding the plywood sheathing for the roof.
3. Begin installation of the roof deck once you have enough trusses in place. Lay a minimum of .75-inch (19 mm) plywood lengthwise from the bottom up to the center ridge using 12 penny nails. Again, keep verifying as you go that the trusses are plumb.
4. Frame in the end once the trusses and deck have been installed. The gambrel roof for exterior walls uses 2 x 4’s (5 x 10’s) on 16-inch (40 cm) centers. Add any additional framing needed for doors or windows. Mount the siding and doors or windows of your choice on the end walls.
5. The thickness of the truss can be increased by laying ply woods on them. Regions with higher amount of rain or snow require thicker roofs. You need to increase the thickness of roofing decks from the minimal .75-inch (19 mm) plywood if you live in areas that get heavy snow loads.
6. Cover the plywood with a waterproof layer, and then finish the roof with whatever shingle or roofing material you wish.


