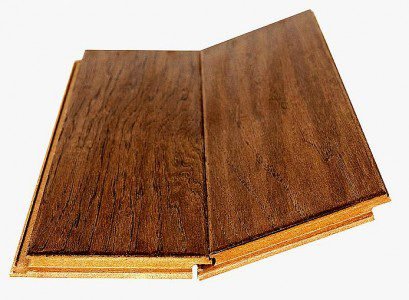
Floating floors is one of the most common types of flooring. It has become a popular option since the ’90s. This growing popularity derives from the fact that this type of floor is “floating” i.e. not attached to the substrate and secondly, it can be installed over almost any existing type of floor.
Connecting panels is simple. So-called “click” and “snap” planks come with “tongue” and “groove”. Tongue from a plank gets into the groove of the other, with a “click” and a “snap”.
Materials & Tools
– Floating Floor Planks; Adhesive; Skirting Board; Spacers
– Just for concrete sub-floor: Builder’s Plastic; High Density Foam Underlay; Waterproof Tape.
– Saw; Hammer; Scrap Wood Block; tape measure; String Line; Pry bar; measuring Tape; Vacuum; Broom & Dustpan
Preparation
1. Surface preparation is critical for a successful floating floor installation.
Using a pry bar remove the baseboard.
Measure the thickness of a plank and add the underlayment thickness. Cut the door casing according to this thickness to allow the floor to slide beneath it.
2. You need your sub-floor to be level and clean.
Therefore, clean thoroughly your sub-floor and remove any dirt and debris.
Vacuum the entire surface. Use a garden hose and wash your sub-floor. Allow enough time to dry completely.
3. Concrete/ Cement Floors:
– If you have a sub-floor made of concrete or cement, you need to make sure that all floor coverings are fixed to the floor.
– Use a moisture barrier made of builder’s plastic between the underlay and concrete (overlap seams = 4cm; larger than surface with almost 5cm on all sides). Seal the builder’s plastic sheets with waterproof tape).
– For the underlay layer use 2-3mm thick, high-density polyethylene foam.
4. To prevent any expansion or contraction of the floor, let the packs floating floor in the room for at least 48 hours. The floor planks will acclimate to room temperature.
Living Room Flooring Types | How To Build A House (howtobuildahouseblog.com)
Installation of a Floating Floor
1. First, you need to install the underlayment. Underlayment pieces should be well united and secured with waterproof tape (recommended by manufacturer).
2. If you are installing for the first time then it is a good idea to lay first several rows of planks to familiarize yourself, with the procedure. Then, measure the width of the area. Divide this by the width of a plank to find the number of the rows.
3. Start installing the floor from a corner of the room. Many manufacturers provide an installation kit. If you do not have this installation kit use spacers between planks.
4. Lay down the first plank. Actually, installation is very simple. The next plank is positioned at an angle with the tong into the groove of the first plank. A simple “snap” and the second plank are fixed. Many manufacturers recommended the first plank of the second row to be around one half of the first row length.
5.The next step is to continue the installation until the room surface is covered. In fact, floating floor installation can be done in two ways;
– Row-by-row
– Laying room sections at a time
6. To install the last row you need to measure and cut the plank. Measure and cut planks to fit around all obstacles such as radiators, wall corners, fireplace, closets, etc.


