This type of ceiling, popcorn ceiling is the most popular and characteristic type of ceiling for buildings built in the ‘70s.
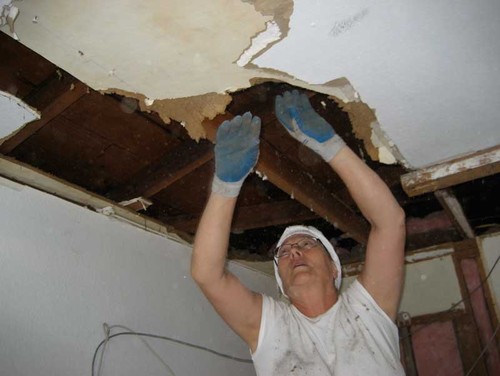
Photo by Rough Linen – Discover living room design ideas
Advantages of Popcorn Ceilings
Popcorn ceiling was popular due to several advantages, among which we mention:
This type of textured ceiling can hide all the imperfections of your ceiling, such s cracks, damage, leaks, etc.
It was cheap and easy to install.
Disadvantages of Popcorn Ceilings
However, popcorn ceiling has some significant disadvantages such as:
Buildings built before 1980 have high levels of asbestos and popcorn ceiling are no exception to this rule. It is strongly recommended that your popcorn ceiling to be tested before you make any removal or repairs. It is known that asbestos is extremely dangerous (even deadly) for your healthy.
Its surface is very rough, and this can make cleaning or painting difficult.
Ceiling Heating System – Advantages and Disadvantages (howtobuildahouseblog.com)
How to Refinish Popcorn Ceiling
Today, many homeowners want to refinish their popcorn ceiling. Why?
However, non-textured finish has a modern and nice look, or you want to match the ceiling texture to the wall texture.
Steps:
1. Suppose you have the ceiling tested for asbestos, start preparing the room for the work.
a) Remove all the furniture, drapes and rugs.
b) Lay down a plastic sheet to protect the floor.
c) Protect the walls; cover them also, with plastic sheets.
d) Turn off the electricity and remove all the light fixtures.
2. You need to keep the ceiling moist during the removal process. Therefore, you should work on small ceiling areas. Use a pump, filled with water, and spray 4-5 sq ft area. Allow 15 minutes water to penetrate the texture of the ceiling. Your ceiling has to be well moist.
3. Check your metal scraper. It should not be too sharp. You do not want to damage your ceiling. While working, be sure to catch the popcorn texture that falls into a painter tray. Removes only the popcorn texture that is well moistened. Work in the same way for all the ceiling sections.
4. Allow time to your ceiling to dry completely.
5. Using a trowel spread drywall compound onto the surface of the ceiling. Try to cover the areas damaged by your scraper. Spread well the mortar compound to create a smooth surface.
6. Allow time to dry and using a medium-grit sander, sand y thoroughly your ceiling.
7. If it is necessary, apply another drywall compound coat.


