Stone fences were originally made without mortar, often being used as field boundaries.
Mortar-less (dry-stone) stone fence structures are also commonly known as dykes in Scotland, Wales, Ireland and England.
Stone fence is also found in a few regions of Italy. European stone walls still exist today, most of them several hundred years old.

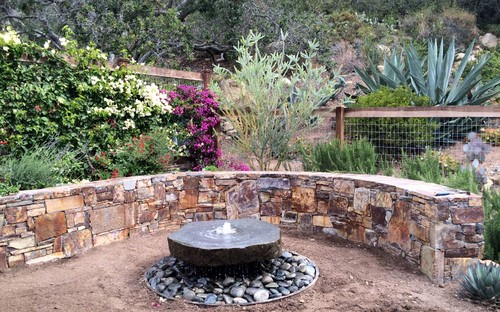
Photo by Hawkeye Landscape Design – Browse landscaping ideas
It is not unusual to see them in the New England area or in the United States as well.
Another interesting use of mortar-less stone fence construction was by indigenous peoples in both Africa and South America, where stone walls were used to construct buildings and create stone retaining walls that made otherwise steep and useless hills into flat, workable land. These methods were in existence in Africa and South America as early as 1300 AD.
Today stone fencing is still very popular, but is almost always built with a cement mortar, similar to a brick wall construction. They are beautiful, full of heritage and very strong. From a practical standpoint, it can also provide needed privacy to your home.
Building a beautiful stone fence is a wonderful project and a great way to add value to an existing property. Using a bit of patience and a little skill, putting together a stone fence will be a truly enjoyable project. Also, you should take precautions to protect your back while doing the construction, as you will be repeatedly lifting objects, some of which may be large and heavy.
Decide where you are interested in building the fence. Calculate the length and height of the desired fence. A well-built stone wall does not require mortar to hold the stones together, although it is often used to provide additional stability. You can introduce mortar within the core of the wall, keeping the appearance of dry-stone walling.
Get a lot of stones. Determine how much stone you will need. Find out what stone will work best aesthetically with your project.
Granite and limestone are common types of stones used in fence building. Use a good mix of large and small stones evenly throughout the fence, rather than using all the large ones for the bottom and only small for the top portion. The even dispersion of the stones is necessary for the support of the structure.
Prepare the ground by digging a trench. It is very important to make sure the soil is sturdy before you start, and will hold your wall. Fill the trench loosely with gravel. Placing larger, flatter stones on top of the gravel will add a firm footing.
Use a hammer and chisel to shape the stones to your liking, but take care not to hit them too hard, because this can lead to breakage. Be gentle and precise.
When you start forming the fence lay out a side rail (with something long like sticks, rulers, wood, small stones) to guide you, and outline where you want your wall, so that your wall is consistent. To make a straight and level wall, get string or flagging tape and tie it between posts on both ends of the fence. Make sure to tie the string / flagging tape at the height you want your fence to use as a guide.
When you select the masonry, look out for flat stones in a variety of sizes and make sure you have some large enough to run the full width of the wall, especially at the base of the structure. Even a low wall will inevitably include some heavy stones. Place the stones down upon the footing one row at a time. Consider adding a slight pitch to the fence to allow for better water run-off. Fit the stones together like pieces in a puzzle. Add cement or crushed screenings between uneven stones to keep them secured in place. To make a strong wall try to place each stone over the gap between two stones beneath it.
For longer walls (50 or more feet) it is beneficial to build up the ends of a straight section (about 3 feet long). Then pull a string line between the completed ends, and build up the center between them. This ensures the face of the wall is straight and even along the entire run.
NOTE:
a) Make sure you build your wall in a safe, sturdy place.
b) Beware of balance issues; if it’s not built correctly it may fall.
c) Be especially careful when working on the corners of the fence. These spots will require larger stones for the added support.
d) Use larger stones at the very top of the fence so that you have added stability.
e) Make sure it’s safe, not on top of any wires or any plumbing outlets.
Materials and Tools:
Stones; wheel barrow; sticks; rulers; wood; string; gloves; goggles; hammer; chisel; mortar.
Building a Wooden Fence | How To Build A House (howtobuildahouseblog.com)


