Installing a bathroom fan is extremely important, especially for a bathroom that has no opening to the outside. A bathroom exhaust fan helps eliminate moisture from the room. Bathroom fan installation is necessary to prevent excessive moisture related problems such as mildew and mold.
Shop bathroom exhaust fans on Houzz
Installing a bathroom fan is quite an easy job, as long you have some basic carpentry and electrical skills. However, the difficulty can escalate from moderate to challenging depending on the route and the length of the duct.
Steps to Take
1. The first thing you need to do is to examine carefully the configuration of your bathroom. You must choose the route of the exhaust duct and the type and the size of the fan box, depending on the bathroom configuration.
There are several ways to run the duct to the outdoors:
– You can run the exhaust duct through the attic to a sidewall and to the outside.
– You can run your fan duct through the roof.
– You can run the duct down through a soffit.
However, in all the situations, your fan must exhaust outside and not to blow into your home attic.
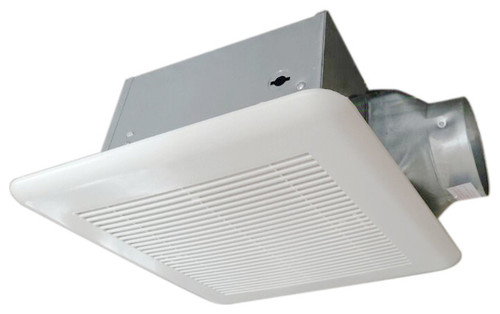
2. Buy a quality bathroom fan and make sure its box fit between the ceiling and the roof joist.
3. Purchase the exhaust duct work. You need also, to buy the duct and the band clamps (that hold the duct in place). Choose a flex steel duct. The air flows better through a steel duct work than through a plastic one.
4. Choose the right spot on your bathroom ceiling for the fan box.
5. Remove the fan and all the contents from the box.
6. When you have selected the proper spot on the bathroom ceiling, make a tiny hole in the ceiling drywall. Use a cordless drill to do that.
7. Insert a metal wire through this hole and find its position inside your attic. There you will install the fan unit.
8. Go inside your attic and clear the area. Remove the insulation and make room for your work.
NOTE: Wear protective gear, glasses, face mask and gloves, when you work with insulation. Protect your skin from irritations.
Turning Your Bathroom into a Spa | How To Build A House (howtobuildahouseblog.com)
9. Take the bathroom fan box inside the attic and put it on the drywall surface with the hole made by you in the middle of the box.
10. Draw the outline of the box on the drywall surface. Now you the exact cutting dimensions.
11. Using a drywall saw cut the hole in the ceiling from the inside of your attic.
12. Place the box over the hole. Secure the fan box in place attaching its support braces to the roof joists.
13. Take the plastic cover of the fan and push it in place. When you hear click means the plastic cover is in place.
14. Using the metal band clamps attach the exhaust fan duct work.
15. Make sure your duct work has the proper length. Point it at a soffit. It is perfect if your soffit has built-in vent. If not, you should buy one. You need to cut only, a hole in the soffit and after that, to install the vent.
16. Now when the duct work and the fan box have been installed you need to connect the electrical wires. It is quite easy if you have some basic electrical knowledge.
17. Replace the insulation inside of your attic. Clean up your work place.
18. Now your work is done. It is preferable to work when it is not to hot outside, considering that you have to spend several hours in the attic.


