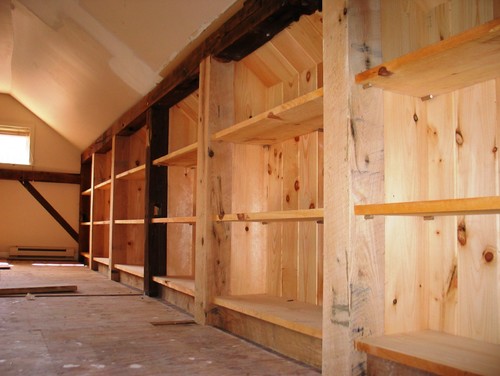
Many homeowners choose to rethink their home attics, converting them in living areas. Others are using their attics as storage, but unfortunately, in time they will become more and more, cluttered spaces.

Photo by Advantage Contracting – Discover exterior home design ideas
Fortunately, you can remedy this situation. I know that. You need everything that you have stored in the attic. Therefore, wise is to build shelves in the attic using the roof structure for a better stability, where you can store boxes filled with your stuff.
It is very simple and easy to do it. You need only two things 1 x 12 and 2 x 4 boards.
Steps to Take:
1. Start, choosing the best place for your shelves. The right place can be between two attic rafters.
First, you need two 2 x 4 boards with a length equal with the distance between the attic floor and 2” above the rafters. They will be your shelves front supports.
2. Using 10d nails, nail the boards vertically to the rafters in such a way that one board end be on the floor and the other against the rafter side.
3. Now you have the front support. For the back support, you need to measure 12 inches, also between the floor and the rafters.
4. Cut two 2 x 4 boards of this length and nail them to the rafters, 12” behind the front support.
5. Now you have the back support too. The next step is to create the shelves. Use a pair of 2 x 4 (length = 16”) for each shelf you want to build. Nail them with an edge to the front support and the other to the back support. They will act as crosspieces for every shelf.
6. Now you are almost done. Measure between these crosspieces, adding 6” to your measure. For shelf use 1 x 12 inches boards. Cut the boards and nail them from the left and right crosspieces, and you are done.
7. The final step is to organize your stuff. Use cardboard boxes or wicker baskets where you can gather your items. Put them on the shelves.
How to Turn Your Home Attic into a Living Space (howtobuildahouseblog.com)


