Decorative stamped concrete is very popular; if you want to stamp your concrete floors or have a stamped concrete patio or driveway you’ve made a good choice. It is a great way to upgrade your concrete work, to give it texture and color. Adding color and imprinting designs in freshly poured concrete is known as concrete stamping.
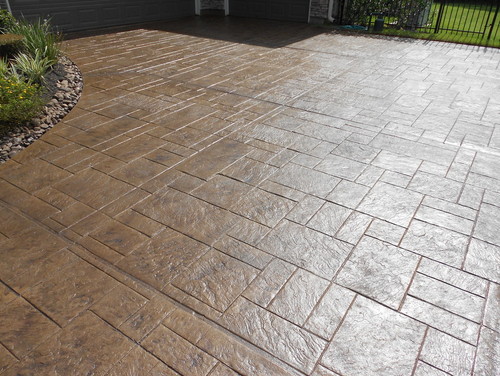
Photo by Concepts In Concrete – Discover landscaping design inspiration
Decorative stamps can be used in conjunction with concrete pigments to make concrete almost any color, texture, or shape.
You can achieve many different looks or designs to resemble flagstone, brick, wood, and bamboo or quarry tile.
There are many different stamped concrete designs available so you can definitely achieve the truly unique look that is right for you. But you can also have them custom made. A custom made concrete stamp may have a monogram, floral design, or seal, for example.
1 – So, before you do anything, you need to decide on a stamped concrete design. It’s a good idea to choose a color and texture of concrete that complements the natural surroundings and adjacent structures.
2 – Pour the concrete. Follow normal procedures with a sub-grade and concrete base that meets the planned specifications and local requirements for mix, depth and reinforcement. Allow the concrete to dry a bit and “bleed” off excessive moisture.
Warning: Your concrete admixtures must not contain Calcium Chloride.
3 – Color the concrete. There are two basic techniques:
- Integral Color: Liquid Color into the ready mix truck. This procedure combines the color with the mix prior to the pour and the slab is colored throughout, or:
- Broadcast Method: Apply color hardener powder directly to the freshly poured concrete surface. Color hardener will penetrate the top of the concrete slab 1/8″ and color thoroughly. This powder, also known as antiquing powder, prevents the stamps from sticking to the concrete. The color in the powder will also add accent and depth to the stamped design.
4 – At the optimum time for texturing, great force is not necessary to press the mat into the concrete. Timing is critical so work should proceed without delay once texturing begins.
Start at one corner of the concrete pour or slab and carefully position the mat or stamp. Align the mat with the first stamping precisely.
The quality of your stamping will be reflected by your considered placement of the stamps or mats. Repeat the process until the entire project has been stamped. Allow the concrete to dry for 24 to 48 hours.
5 – Use a leaf blower to remove excess release powder. Blow away from you in one direction. Always wear a dust mask, eye protection and gloves when working with powders that can blow in the wind or cause skin irritation.
6 – You can apply additional layers of concrete colored powders or liquid. Only allow them to dry between coats. Use a high-powered pressure washer (3000 PSI is recommended, but be careful, concrete can be damaged) to remove excessive color from the surface of the concrete.
Try to spray so that some of the release remains in the grout lines and deeper indentations. This will result in a more natural, aged and shadowed effect.
7 – To keep your stamped concrete looking clean and new, you should apply a seal and clean it regularly. So, seal the concrete with an appropriate decorative concrete sealer according to manufacturer directions.
Sealant is especially important to protect outdoor surfaces that are subject to freezing and thaws. A light coat should be applied in one direction and a second coat should be applied in a perpendicular direction in order to avoid unwanted lines.
A Smart Solution for Every Surface – Concrete Concrete (howtobuildahouseblog.com)


