A stair banister can update your home by adding style and beauty to your staircase. Stair banisters provide also, important structural and safety components to stairs, from simple handrails to complex structures designed for aesthetics and safety. Without a properly installed handrail, a stairway is a potential site for accidents in the home.
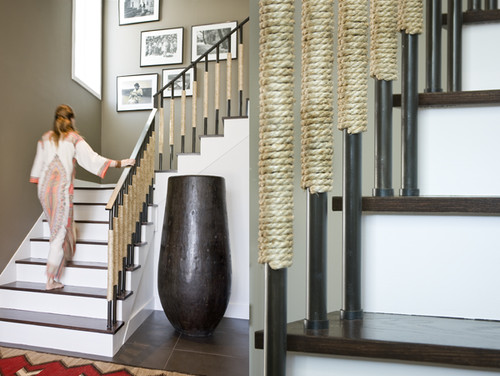
Photo by – More staircase ideas
Installing a wood banister is a great DIY project and much easier than you might think. With the use of some wood and a few tools and supplies, you will be able to install a banister.
Steps:
Mark Positions and Take Measurements
1. At the top of the staircase, use a pencil to make a tick mark on the wall 36″ (or contact your local building department for the codes) above the front tread of the second step. That’s where the top of the handrail will rest.
2. Figure out where to place the handrail brackets by measuring the height of the handrail, top to bottom.
3. Subtract that distance from the 36″, and make another mark below the 36″ mark. For example, if the handrail is 2″ deep, you’d pencil a mark on the wall above the front tread of the second step on the staircase. That’s where the top of the bracket should rest.
4. Take the same measurements and make the same type of marks at the bottom of the staircase, using the step that’s second from the bottom to measure.
Buy a Banister
Visit your local home improvement store and order a banister.
Cut the Banister to Fit the Staircase
1. Measure the total amount of wood that you will need to fit the staircase.
2. Use a power saw to cut the banister.
3. Miter the ends of the banister. Use a miter box to do so and follow the instructions that apply to the brand that you choose.
Cut a 45-degree miter on one end of the rail with a miter saw;
Lay the rail on the stairs and mark the rail with a pencil where the rail contacts the front stair nosing; this cut is for the short return to the wall.
Set your miter to a 16-degree angle and saw the rail at the mark and cut the opposite angle on the remaining rail piece; this cut is for the horizontal top section.
Run a String for Guidance
Run a string from the top of the staircase wall to the bottom, starting with the mark you made to indicate where the top of the bracket should rest.
The string represents the bottom of the handrail and will give you a line to follow when you space the handrail brackets out along the stairwell wall.
Locate the Studs in the Walls
You must secure banisters to the wood beneath the plaster and drywall in order for the banister to be safe.
1. Do this by using a stud finder. You need to locate studs to attach the brackets to.
2. Find one at the top first, as near to the second tread as possible, then one at the bottom.
3. Find the studs between top and bottom for the middle brackets and try to space them evenly.
4. Mark the location of each stud on the wall.
Attach the Brackets and the Handrail
1. Center the rail brackets vertically on the studs at the top and bottom of the banister and mark the wall with a pencil for placement of all three holes in each bracket.
2. Screw in the top bracket first, using an electric. Next attach the bottom bracket, then the middle two.
3. Have someone help you. Lift the handrail onto the brackets, placing the ends wherever is aesthetically pleasing.
NOTE: The end of the handrail or banister should never rest more than 24″ from the end bracket on either side.
Replacing Ceramic Tile on Wood Stairs – Tips and Ideas (howtobuildahouseblog.com)


