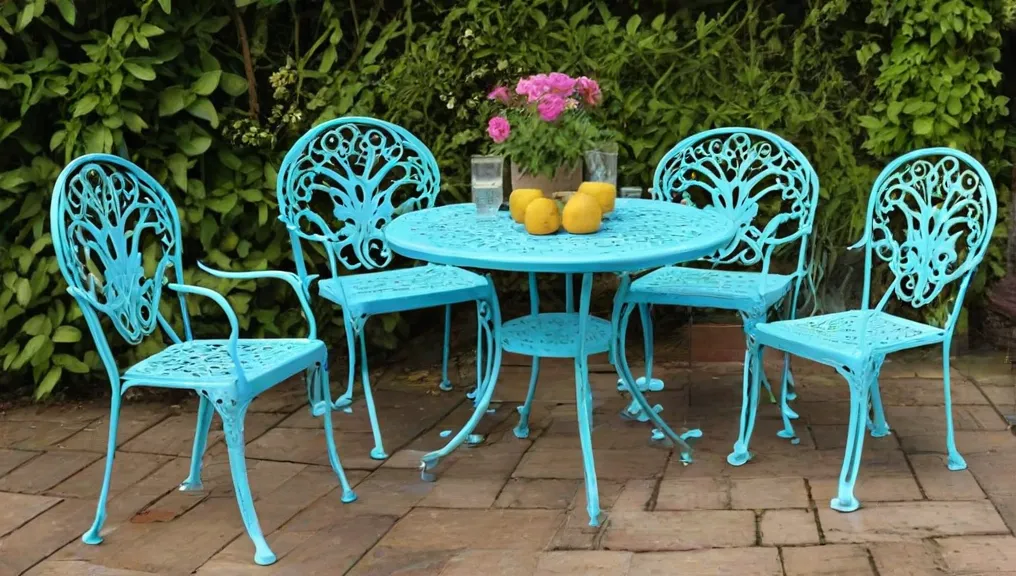
Learn how to understand and combat rust formation on outdoor furniture made from materials like iron, steel, and aluminum. Discover the steps to prepare and paint rusty furniture using the right tools, primers, and paints for long-lasting protection and aesthetic appeal. Follow essential maintenance tips to keep your outdoor furniture in pristine condition and extend its lifespan.
Understanding Rust Formation on Outdoor Furniture
Rust formation is a common challenge faced by those who own outdoor furniture. The phenomenon primarily occurs on materials such as iron and steel, which are commonly used in outdoor furniture due to their strength and durability. Rust, scientifically known as iron oxide, forms when iron reacts with oxygen in the presence of moisture. This reaction is catalyzed by several environmental factors including rain, humidity, and even the presence of salt, particularly in coastal areas where sea spray can accelerate the corrosive process.

Iron and steel outdoor furniture are especially vulnerable to rust formation. When these materials are exposed to moisture and air, the iron components undergo oxidation. This process not only affects the visual appeal of the furniture, resulting in reddish-brown patches and flaky surfaces, but also undermines the structural integrity over time. Even a small scratch or chip in the furniture’s protective coating can expose the metal to the elements, thereby initiating the rusting process.
Please, read our post and do not forget to check my YouTube channel “Grig Stamate – Interior Design Solutions”:
https://www.youtube.com/@GrigStamate
You will find here, thousands of ideas for your home interior and outdoors.
Allow me to mention one of them:
Beautiful Succulent Garden Arrangements (2) | OUTDOOR DECOR & LANDSCAPING IDEAS #14 (video)
Aluminum, another common material used in outdoor furniture, is more resistant to rust but not entirely immune. Although aluminum does not rust in the same manner as iron or steel, it can corrode. Oxidation in aluminum results in a dull, whitish appearance that can compromise its durability if left unattended. This type of corrosion, albeit less aggressive, still warrants preventive measures.
The weather significantly impacts the rate of rusting. High humidity levels and frequent rain spells provide a continuous source of moisture that facilitates the oxidation process. In coastal areas, the presence of salt in the air further exacerbates the situation, as salt acts as an electrolyte, accelerating rust formation. Consequently, outdoor furniture in such environments tends to rust more quickly.
Owners of outdoor furniture should be vigilant for signs of rust, such as discoloration, rough patches, and flaking paint. If left untreated, rust can lead to permanent damage, making the furniture unsafe and shortening its lifespan significantly. Therefore, understanding the causes and locations of rust formation is crucial for effective maintenance and longevity of outdoor furniture.
Preparing Rusty Furniture for Painting
Before embarking on the task of painting rusty outdoor furniture, it is essential to take appropriate safety precautions. Wearing sturdy gloves and protective eyewear is crucial to protect your hands from sharp edges and your eyes from flying debris during the rust removal process.
To effectively prepare the furniture, you will need several tools and materials. These include wire brushes, sanding pads, and rust converters. Each of these items plays a critical role in ensuring the furniture is optimally prepared for painting.
Begin by using a wire brush to remove loose rust and flakes from the surface of the furniture. This process is essential for eliminating any weak or peeling rust that could interfere with the adhesion of paint. Brushing vigorously will help you to get rid of larger rust flakes and prepare the surface for more detailed work.
Next, employ sanding pads to smooth out the rough patches left by the wire brush. Sanding will also help in removing smaller rust particles that the brush might have missed. Using a sanding pad with an appropriate grit level ensures that the surface is uniform and free of imperfections that could affect the final paint job.
After the sanding process, thoroughly clean the surface to remove any residual dust, dirt, or debris. A clean surface is vital for the subsequent steps, as contamination can lead to poor adhesion and an uneven finish. Wipe the furniture down with a damp cloth and allow it to dry completely.
The final step in preparation is to apply a rust converter. This chemical treatment neutralizes any remaining rust, converting it into a stable compound that can be painted over. Using a rust converter is crucial because it ensures that the rust does not continue to deteriorate the metal beneath the new paint layer. Follow the manufacturer’s instructions for application and drying times to achieve the best results.
By meticulously following these steps, you lay the groundwork for a smooth, long-lasting paint finish that will not only enhance the appearance of your outdoor furniture but also extend its lifespan.
Selecting the Right Paint and Primer
When reviving rusty outdoor furniture, it is crucial to select appropriate paint and primer to ensure both protection and aesthetic appeal. Rust-inhibitive primers are essential as they form a protective barrier that prevents further corrosion. These primers, designed specifically for metal surfaces exposed to the elements, enhance paint adhesion and longevity.
Oil-based primers are particularly effective for outdoor metal surfaces because of their robust protective properties against moisture and rust. They provide a solid base for the paint to adhere to, which is crucial for durable, long-lasting results. However, they require a longer drying time and emit strong odors, necessitating proper ventilation during application. Conversely, latex primers offer easier cleanup, quicker drying times, and low volatile organic compound (VOC) emissions, making them an environmentally friendly option. Despite these benefits, latex primers may not provide the same level of rust inhibition as their oil-based counterparts.
Choosing the right paint is equally important. Oil-based paints are highly durable and provide excellent water resistance, making them suitable for outdoor furniture. However, they can be challenging to work with due to their thick consistency and long drying times. Latex paints, while less durable, are flexible, which accommodates the expansion and contraction of metal surfaces exposed to varying weather conditions. They are also easier to apply and clean up, with the added benefit of being low in VOCs. Epoxy paints represent a robust option, offering exceptional durability and resistance to scratches, chemicals, and humidity. However, their application process can be more complex, often requiring a two-part mixing system.
For those seeking recommendations, brands such as Rust-Oleum and Krylon are well-regarded for their rust-resistant qualities and durability. These brands offer various products tailored to outdoor metal surfaces, providing a balance between protection and aesthetic enhancement.
When selecting colors and finishes, consider options that complement your outdoor décor while masking imperfections. Matte or satin finishes can hide surface flaws, while gloss finishes offer a sleek, modern look. Ultimately, selecting the right paint and primer ensures your outdoor furniture remains both protected and visually appealing.
Painting and Maintaining Your Outdoor Furniture
Properly painting your outdoor furniture is a multi-step process that begins with applying a primer. Begin by selecting a primer specifically designed for metal surfaces, ensuring it is rust-inhibitive. Shake the primer can well before use and apply it evenly across the entire surface of your furniture. This can be achieved through either brushing or spraying, depending on the size and complexity of the piece. Allow the primer to dry completely, which usually takes several hours, before moving on to the painting stage.
When it comes to painting, choose a high-quality, outdoor-grade paint that complements the rest of your outdoor decor. For application, use a paintbrush, roller, or spray gun based on the nature of the surface area. Begin with a thin, even coat to ensure smooth coverage without drips. It’s generally recommended to apply at least two coats for optimal durability and finish, allowing sufficient drying time—typically 24 hours—between each coat.
After the final coat of paint has dried, consider a sealant for added protection. This will not only enhance the aesthetics but also extend the lifespan of your outdoor furniture. Opt for a clear, UV-resistant topcoat to shield the paint from harsh sunlight and other outdoor elements.
Once you have invested time and effort into revitalizing your outdoor furniture, maintaining it becomes essential to prolong its lifespan. Regular upkeep involves periodic inspection for any signs of rust or chipping paint. Small spots can be managed with touch-up paint, while larger areas may require sanding and repainting. Additionally, covering your furniture during adverse weather conditions can significantly reduce the wear and tear caused by rain, snow, or intense sunlight. Applying protective covers and storing furniture indoors during off-seasons are practical ways to minimize damage.
By committing to these maintenance practices, you ensure that your outdoor furniture remains in pristine condition, thus maximizing your investment and enhancing the overall appeal of your outdoor living space.
Other related posts from our website:
https://howtobuildahouseblog.com/coffee-grounds-a-miracle-remedy-for-your-garden/
https://howtobuildahouseblog.com/baking-soda-a-miracle-remedy-for-the-garden/
https://howtobuildahouseblog.com/creating-a-garden-that-bumblebees-bees-and-butterflies-love/
Thank you so much for your attention.
Stay tuned. We will upload many other amazing posts to our website and videos onto our YouTube channel.
Thank you so much.
for your time and attention.
Best Regards
See you to another post,
Bye, Bye


No Responses