Learn the step-by-step process of painting a facade, from preparation and cleaning to priming, painting, and finishing touches. This comprehensive guide ensures a durable, aesthetically pleasing, and long-lasting paint job. Follow our expert tips to address surface imperfections, choose the right primer and paint, and maintain your facade to keep it looking fresh for years to come.
Step 1: Preparation and Cleaning
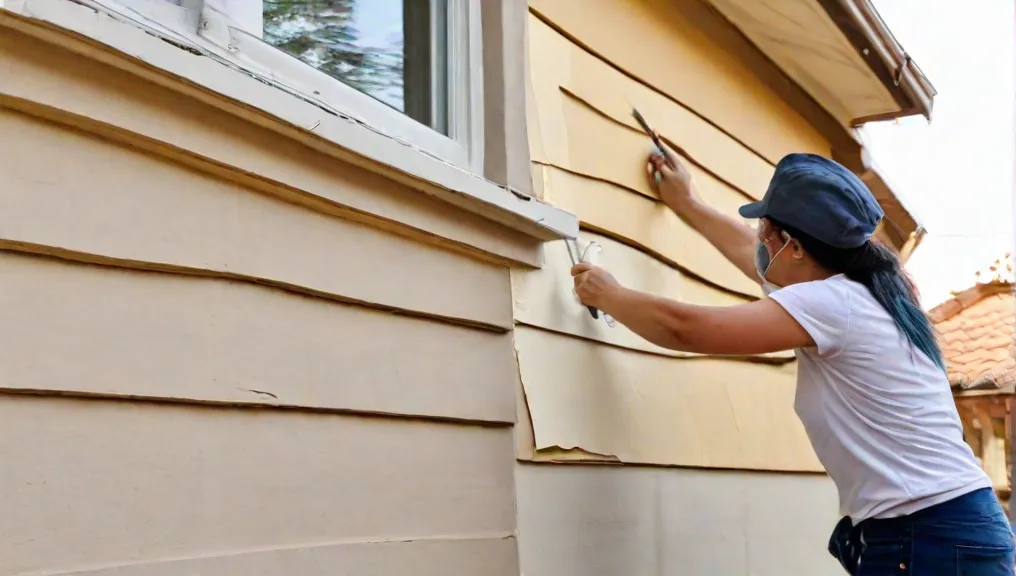
The initial phase in painting a facade involves meticulous preparation and cleaning, which serves as the foundation for a successful and long-lasting paint job. Begin by thoroughly inspecting the facade for any signs of damage such as cracks, mold, or peeling paint. These issues must be addressed promptly to prevent any underlying problems from compromising the integrity of the new paint. Cracks should be filled with a suitable filler, and peeling paint needs to be scraped off to create a smooth surface.
Please, read our post and do not forget to check our YouTube channel “Grig Stamate”:
https://www.youtube.com/@GrigStamate
You will find there, thousands of designing, furnishing, and decorating ideas for your home interior and outdoors.
Allow me to mention one of them:
Tour of a Stunning MODERN HOUSE, High Standard MATERIALS and WORKMANSHIP (video)
Once the inspection and repairs are complete, proceed with cleaning the facade. This step is crucial for ensuring that the paint adheres properly. Utilize a pressure washer to efficiently remove dirt, dust, and any loose paint. The high-pressure water can reach into crevices and clean areas that manual scrubbing might miss. In cases where mold or mildew is present, applying a mold remover is essential. Allow the solution to sit for the recommended time before rinsing it off. This will not only clean the surface but also help in preventing mold from recurring.
After cleaning, it is imperative to let the facade dry completely. Painting over a damp surface can lead to poor adhesion and blistering, which ultimately reduces the lifespan of the paint. Depending on the weather conditions, drying times can vary, so ensure that the facade is entirely dry before proceeding to the next step. Proper preparation and cleaning set the stage for a durable and aesthetically pleasing paint finish, making this step indispensable in the facade painting process.
Step 2: Priming the Surface
Once the facade is thoroughly cleaned, the next critical step is to apply a primer. Priming serves multiple purposes, primarily creating a smooth and even base for the subsequent paint layers. Selecting the appropriate primer is essential, as different surfaces necessitate specific types of primers. For example, a primer suitable for brick may not be ideal for stucco, wood, or other materials. Therefore, ensure that the primer you choose is compatible with the facade’s material.
Application of the primer can be executed using either a brush or a roller. The goal is to achieve an even coat that thoroughly covers the surface, including all nooks and crannies. This comprehensive coverage is vital to seal the surface adequately, thereby enhancing the adherence of the topcoat. When applying the primer, use steady and consistent strokes to avoid uneven layers and ensure that the primer penetrates any porous sections of the facade.
After the primer is applied, it’s crucial to allow it to dry completely before proceeding to the next step. The drying time can vary depending on the type of primer used and the environmental conditions such as temperature and humidity. Typically, a primer may require anywhere from a few hours to a full day to dry thoroughly. Rushing this process can result in a subpar finish, as the topcoat may not adhere properly to a still-wet primer.
In essence, priming is a foundational step that prepares the surface, ensuring a longer-lasting and more durable paint job. It helps to seal the pores of the material, provides a uniform surface for the topcoat, and enhances the overall appearance of the facade. By taking the time to apply the primer correctly, you set the stage for a successful painting project, ensuring that the final results are both aesthetically pleasing and long-lasting.
Step 3: Painting the Facade
With the surface properly primed and prepared, you are now ready to begin the painting process. Selecting the right exterior paint is crucial; choose a high-quality paint that is specifically designed for the material and climate conditions of your facade. This will ensure durability and aesthetic appeal.
Start by cutting in around the edges and corners of the facade using a brush. This technique involves painting the areas that are hard to reach with a roller, such as around windows, doors, and other trims. Cutting in provides a clean outline and helps in achieving a uniform finish when you move on to larger areas.
For the main sections of the facade, use a roller to apply the paint evenly. It is important to avoid overloading your brush or roller with paint to prevent drips and uneven coverage. Rollers are ideal for covering large, flat surfaces quickly and efficiently. Begin painting from the top of the facade and work your way down, applying consistent pressure to distribute the paint evenly.
Depending on the color and type of exterior paint selected, you may need to apply multiple coats to achieve the desired finish. It is critical to ensure that each coat is thoroughly dry before applying the next one. Drying time can vary based on the paint specifications and environmental conditions, so refer to the manufacturer’s instructions for optimal results.
Patience and attention to detail are essential in this step to achieve a professional and long-lasting finish. Take your time to inspect each coat carefully, ensuring there are no missed spots or uneven patches. Properly executed, this step will not only enhance the aesthetic appeal of your facade but also protect it from the elements for years to come.
Step 4: Finishing Touches and Maintenance
Once the primary painting is complete, the final step involves adding finishing touches and planning for ongoing maintenance. Begin by inspecting the painted facade meticulously for any missed spots or uneven areas. Utilize a fine brush to touch up these imperfections, ensuring a uniform appearance throughout.
Next, carefully remove any masking tape applied during the preparation phase. This should be done with caution to prevent peeling off any fresh paint. After the tape is removed, clean up the surrounding area by picking up any drop cloths and properly disposing of any used materials. A thorough clean-up not only helps in maintaining a neat environment but also ensures that the focus remains solely on the newly painted facade.
To prolong the longevity of your paint job, consider applying a sealant or protective coating. These products serve as a shield against environmental factors such as UV rays, rain, and fluctuating temperatures, which can deteriorate the paint over time. A sealant adds an extra layer of durability, preserving the vibrant appearance of your facade.
Regular maintenance is fundamental in keeping your facade looking fresh and well-maintained. Periodically inspect the facade for any signs of wear, such as chipping, cracking, or fading. Addressing these issues promptly can prevent minor damages from escalating into more extensive repairs. Small touch-ups and timely interventions will greatly extend the lifespan of your paint job.
Proper care and maintenance are essential in ensuring that your facade remains visually appealing and structurally sound. By following these steps and committing to regular upkeep, your facade will continue to enhance the aesthetic appeal of your property for many years to come.
Other related posts from our website:
https://howtobuildahouseblog.com/how-to-correctly-choose-the-color-of-the-house-facade/
https://howtobuildahouseblog.com/harmony-and-bravery-in-choosing-colors-for-the-house-facade/
Thank you so much for your attention.
Stay tuned. We will upload many other amazing posts to our website and videos onto our YouTube channel.
Thank you so much.
for your time and attention.
Best Regards
See you to another post,
Bye, Bye


No Responses