Deck is the place for your barbecue, lounge, chairs, and the right place for the warm, long summer nights, the place where you can spend memorable hours with your family and friends. Building a deck to sit outside is an attractive option for most North American homeowners. All you need is to be handy with tools and like to build things yourself.
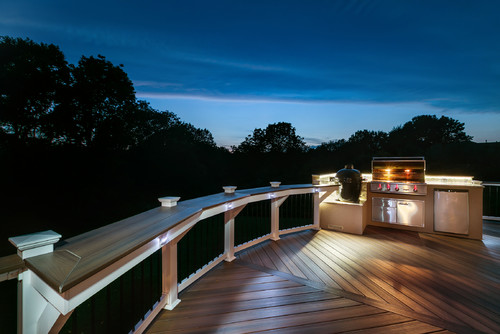
Photo by American Deck and Patio – More deck ideas
As outdoor entertainment and do-it-yourself home improvement projects have become more affordable and efficient, more and more plans and materials have become available for homemade deck building. Today you can choose between purchasing a deck product that can be assembled quickly to mapping out and designing your own plan.
Learning how to build a deck means following specific steps, no matter what the design:
1. Design Plan: To eliminate any possibility of accidents, make sure your deck design plan eliminates all safety hazards that may arise such as:
a) What are the municipality rules and regulations;
b) Does your homeowners’ insurance policy cover this sort of addition?
c) If a swimming pool is involved think about neighborhood kids;
d) How much time and experience you have to apply to a project like this.
e) Get the proper permits.
2. Tools & Materials:
Tools: circular saw; hand saw; impact wrench; electric screwdriver; levels; string line; pneumatic hammer; gloves; safety goggles; dust mask.
Materials: galvanized nails; lag screws; concrete piers; wooden posts; flashing; ledgers; joist hangers; benches; planters. – If solid wood is your preference, you can choose pressure-treated lumber, which is the most inexpensive material option. Lumber is sure to last a few decades. Composite woods are a combination of recycled plastics and wood. The look of these boards has improved considerably over the years, but it’s important to note that while composites can be used only for the decking and rails, you’ll need solid wood for the entire support structure.
3. Prepare the Place:
- Check drainage and grading where the deck will be built and fix any problems.
- Foundation: The most beautiful deck is worthless atop a bad foundation. The deck footings need to set in undisturbed soil to prevent settings. Concrete piers take more effort, but, if they’re properly installed, they will support a deck without moving at all throughout its lifetime. This system involves holes dug to the frost line (check your local requirements) with concrete poured into tubular cardboard forms. For extra resistance to frost heaving, wrap the cardboard in black poly and add rebar to the concrete pier. To finish it off, add a post saddle to the top of the wet concrete.
4. Design Techniques: The best thing is to imagine your deck before you build it. Lay out the parameters of the deck you think you want with a rope, including stairs and entrance. Place pickets in the corners and host a barbecue. Try to imagine how the real deck will look.
5. Set the Ledger: A ledger board is a piece of lumber that is used to build decks. It is attached directly to the house where the deck is connected to your home. Ledger boards are not used in free-standing decks. They act as extra support for decks attached to a house and take the place of additional support beams. A strong skeleton is needed for a strong deck. You need to set the ledger board against a flat surface of the house. Removing house siding will create a flat surface, but will create leaks, so it is not recommended. To create a flat surface it is better to use shims. If you desire your deck to be level with an adjacent floor, your deck should be directly below the door jam of that room when finished.
6. Flashing: Before beginning the framework of your deck, install some flashing along your home to shield it from moisture. Flashing is a water barrier of some sort — anything from aluminum to PVC – that protects against wood rot. Check in your area to see what’s recommended and available. (If it is a stucco house, no need for flashing)
8. Rails and Stairs: You’ve planned the basic structure, now you can work out some important details. Like decking dimensions, each municipality has unique requirements for railings so be sure your railing complies. The rails and stairs are not only necessary elements of a deck but also ones that need careful consideration for both safety and beauty. Poorly built steps will make your deck the last place where anyone wants to be. Some basic rules:
a) Avoid having slopes or slippery surfaces.
b) If you have more than two steps, you need a handrail.
c) Ensure all your steps are equal.
10. Finishing and Sealing: Apply any protective finishes. Once you’ve done the hard work, it’s time for finishing and sealing the wood. – One of the main sources of weak wood and danger, water affects wood’s strength. Although wood naturally retains some moisture, excessive water can damage your deck, destabilizing it, especially at connection points or at the flashing. Definitely, you need to seal the wooden deck.
11. Decking Extras: Beware the temptation to roof your deck. While most municipalities prevent roofing the deck. The reason is because owner after owner may add more and more to this roofed deck until it eventually becomes an addition to the house. Built on a poor foundation not strong enough to hold a snow load on the roof year after year, this spells disaster for the last homeowner.
12. Amenities: Add amenities, such as benches, planters, barbecues, patio furniture.
How to Refinish Your Deck | How To Build A House (howtobuildahouseblog.com)


