There are 3 main types of Railway Sleepers, Reclaimed or Used Railway Sleepers, New Softwood Railway Sleepers and New Oak Railway Sleepers.
New Softwood Treated Railway Sleepers have become very popular in recent years, they offer greater regularity and consistency than Reclaimed or Used Railway Sleepers whilst also being free from creosote and much lighter and easier to handle.
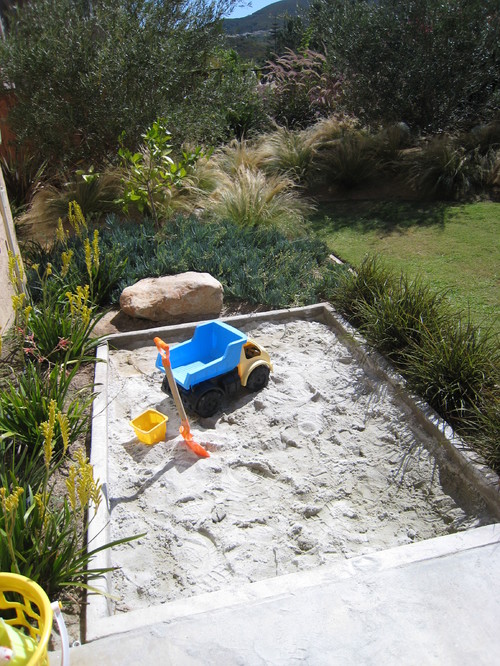
Photo by – Look for landscaping pictures
One of the key features with New Railway Sleepers is that they are sawn for the gardening and landscaping market and as such are sawn to both traditional sizes and also smaller sizes that are easier to handle and work with. New Treated Softwood Railway Sleepers are extremely versatile and can be used in many gardening and landscaping applications, ideal for raised beds and planters, retaining walls, steps and edging to name but a few.
Building a children’s sandpit from New Treated Softwood Railway Sleepers is one of the simplest and most enjoyable tasks you could undertake in your garden. However, in building a sand pit for your kids, the first thing that you should consider is the place where you want to put it. It must have a good view from inside the house so that you can see your children while they are playing in the garden.
Kids’ Room Storage Space | How To Build A House (howtobuildahouseblog.com)
Preparation:
Once you’ve settled on the size and location of your new sand pit, the next task is to you will need to prepare the ground. You should build the sand pit on a flat area. First of all remove any grass, rake and level the area. Of course, there is no need for this though if the area that you will place the sandpit is already level or in an existing patio.
Materials:
- Play sand
- New Treated Softwood Railway Sleepers
- Decking Screws; Timber-lock screw/ sleeper fixing brackets
- Fabric membrane – put this underneath so the weeds will not grow.
Steps:
1. Measure and cut the Railway Sleepers. Measure the sleepers to the required size and cut them using chainsaw, a handsaw or a circular saw.
2. Once cut, lay them down around the perimeter area of the sandpit.
3. Then attach the sleepers using the sleeper screws, metal brackets or timber-lock screws. The sleepers will be laid flat at double layers wherein the joints are connected in a brick pattern and screw firmly.
4. You can paint the railway sleepers to be more attractive.
5. Measure the fabric membrane and cut it in such a way that it will fit in the sand pit. Place the edges within the sand frame so that it will not move when the children are playing. This can be achieved using a staple gun. If multiple lengths of membrane are required, make sure their edges overlap by at least 20cm to prevent weeds from getting through.
6. Add the play sand and place them in the sand pit. You can fill the sand pit with as much or as little sand as you like but a depth of at least three inches (75mm) across the base will prevent contact with the underlying ground.
7. Make a covering for the sandpit so that there will be no falling debris that will come in contact with the play sand.


