Understanding the Basics of Building a Freestanding Divider Wall
Building a freestanding divider wall can be a great way to create separate spaces within a room without the need for permanent construction. Whether you’re looking to add privacy to an open office space, divide a large room into separate areas, or simply create a decorative element, a freestanding divider wall can be a versatile and practical solution. In this guide, we’ll explore the essential steps and considerations for building your own freestanding divider wall.
Read this article and do not forget to check our YouTube channel “Grig Stamate” for tones of amazing videos:
https://www.youtube.com/@GrigStamate
Room Dividers | Smart and Creative Ideas (video)
Gathering the Necessary Materials and Tools
Before you begin the construction process, it’s important to gather all the materials and tools you’ll need for building the freestanding divider wall. The specific requirements may vary depending on the design and size of the wall, but some common materials and tools include:
- Wood or metal posts for the frame
- Paneling or screening material for the wall surface
- Screws or nails for assembly
- Paint or stain for finishing (if desired)
- Measuring tape and level
- Saw for cutting the materials to size
- Drill or hammer for assembly
Once you have all the necessary materials and tools, you can move on to the next steps in the construction process.
Constructing the Frame of the Divider Wall
The first step in building a freestanding divider wall is constructing the frame. This frame will provide the structure and support for the wall, so it’s essential to ensure that it is sturdy and well-built. You can use wood or metal posts to create the frame, depending on the desired aesthetic and functional requirements.
Start by measuring and cutting the posts to the desired height of the divider wall. Use a level to ensure that the posts are perfectly vertical, and then secure them in place using screws or nails. If you’re creating a multi-panel divider wall, you’ll also need to install horizontal support beams to connect the posts and create the framework for the wall panels.
Once the frame is constructed, you can proceed to the next phase of building the freestanding divider wall.
Adding the Wall Surface and Finishing Touches
With the frame in place, it’s time to add the wall surface to complete the freestanding divider wall. Depending on your design preferences and the intended function of the wall, you can use a variety of materials for the wall surface, such as paneling, screening, fabric, or even glass.
Carefully measure and cut the chosen material to fit within the frame, ensuring a snug and secure fit. Attach the wall surface to the frame using screws or other appropriate fasteners, making sure that it is evenly positioned and well-supported.
Finally, if desired, you can apply a coat of paint, stain, or other finish to the divider wall to enhance its appearance and durability. This step can also be an opportunity to add decorative elements or personal touches to the wall, depending on the overall design scheme of the space.
Conclusion
Building a freestanding divider wall can be a rewarding and practical project that adds both functionality and aesthetic appeal to a room. By following the essential steps outlined in this guide and exercising creativity in design and material selection, you can create a custom divider wall that meets your specific needs and complements the overall ambiance of the space.
Whether it’s for creating private work areas, defining separate zones in a shared space, or simply adding a decorative element, a well-constructed freestanding divider wall can be a valuable addition to any interior environment.
Customizing Your Freestanding Divider Wall
One of the great advantages of building a freestanding divider wall is the ability to customize it to suit your specific needs and preferences. Whether you’re looking to create a functional partition or a decorative element, there are endless possibilities when it comes to personalizing your divider wall.
For example, you can experiment with different materials and finishes to achieve a unique look. Instead of traditional wood or metal, you could consider using materials like fabric, glass, or even repurposed items like old doors or shutters. The possibilities are endless, and the right choice will depend on the overall aesthetic you’re aiming for.
Another way to customize your freestanding divider wall is by incorporating storage or display elements. You could add shelves, hooks, or even built-in compartments to create a multifunctional piece that serves both a practical and decorative purpose. This can be especially useful in smaller spaces where every inch of the room needs to be utilized effectively.
If you want to take your customization even further, you could consider adding movable or adjustable elements to your freestanding divider wall. This could include hinges, wheels, or even a sliding mechanism that allows you to easily reconfigure the layout of the space as needed. This level of flexibility can be particularly valuable in homes or offices where the needs and demands of the space are constantly evolving.
Incorporating Lighting and Greenery
Another way to enhance the visual appeal and functionality of your freestanding divider wall is by incorporating lighting and greenery. These elements can not only add a touch of style and ambiance but also serve practical purposes.
When it comes to lighting, you could install task lighting, such as sconces or spotlights, to illuminate specific areas or create a warm, inviting atmosphere. Alternatively, you could opt for more decorative lighting fixtures, such as pendant lights or string lights, to add a touch of whimsy and personality to the space.
Incorporating greenery, such as potted plants or hanging vines, can also be a great way to bring life and vibrancy to your freestanding divider wall. Not only do plants add a natural and organic element to the space, but they can also help to improve air quality and create a sense of tranquility and relaxation.
When selecting plants for your divider wall, consider factors like the amount of available light, the level of maintenance you’re willing to commit to, and the overall aesthetic you’re trying to achieve. Some low-maintenance options that work well in these types of spaces include succulents, snake plants, and philodendrons.
Considering the Placement and Integration of Your Divider Wall
When planning and building your freestanding divider wall, it’s important to carefully consider its placement and integration within the overall space. The location and positioning of the wall can have a significant impact on its functionality, visual appeal, and how it interacts with the rest of the room.
One factor to consider is the flow of the space. You’ll want to ensure that the placement of the divider wall doesn’t disrupt the natural traffic patterns or create any bottlenecks or obstructions. Carefully measure the dimensions of the room and experiment with different layouts to find the most optimal placement for your wall.
Another important consideration is how the divider wall will interact with the existing furniture, decor, and architectural elements of the space. You’ll want to ensure that the wall complements and enhances the overall aesthetic, rather than feeling like a disconnected or jarring addition.
To achieve a seamless integration, you may need to consider factors like the height, width, and color of the wall, as well as how it aligns with other design elements in the room. Careful planning and attention to detail can help ensure that your freestanding divider wall feels like a natural and purposeful part of the overall space.
Maintaining and Caring for Your Freestanding Divider Wall
Once you’ve built your freestanding divider wall, it’s important to maintain and care for it to ensure its longevity and continued functionality. Depending on the materials and finishes you’ve used, the maintenance requirements may vary, but there are some general best practices to keep in mind.
Regular cleaning and dusting are essential to keep your divider wall looking its best. Use a soft, lint-free cloth to wipe down the surface, and be sure to address any spills or stains promptly to prevent them from setting in and becoming more difficult to remove.
If your divider wall has a painted or stained finish, it’s important to periodically inspect it for any signs of wear or damage, such as chipping, peeling, or fading. In these cases, you may need to touch up the finish or even consider repainting or refinishing the entire wall to restore its appearance.
For divider walls with more delicate materials, such as fabric or glass, you’ll need to take extra care to avoid scratches, cracks, or other forms of damage. Consider using protective covers or screens when the wall is not in use, and be mindful of any furniture or objects that may come into contact with it.
Finally, it’s important to regularly check the structural integrity of your freestanding divider wall, especially if it’s subject to frequent movement or relocation. Ensure that the frame is still securely in place and that all fasteners and connections are tight and secure. If you notice any signs of instability or wear, it’s best to address them promptly to maintain the safety and functionality of the wall.
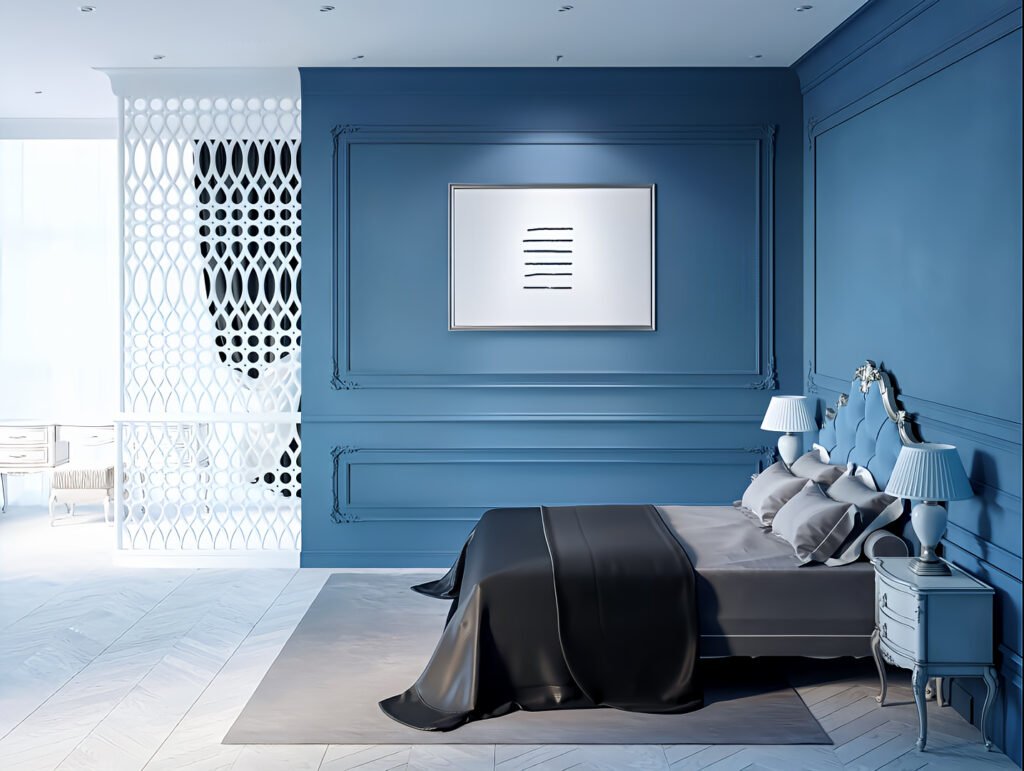
Exploring Creative and Unconventional Divider Wall Ideas
While the traditional freestanding divider wall is a practical and versatile solution, there are many creative and unconventional ways to incorporate divider elements into your space. These innovative approaches can not only serve a functional purpose but also add a unique and visually striking element to the overall design.
One such example is the use of room-dividing screens or curtains. These lightweight and flexible solutions can be easily moved and rearranged to create temporary or semi-permanent partitions within a room. They come in a wide range of materials, from sheer fabrics to woven rattan, and can be customized to match the aesthetic of your space.
Another creative option is to use repurposed or upcycled materials to create your divider wall. This could involve using reclaimed wood, old doors or windows, or even vintage furniture pieces to construct a one-of-a-kind partition. Not only does this add a touch of character and personality to the space, but it also aligns with the growing trend of sustainable and eco-friendly design.
For a more modern and minimalist approach, you could consider using sleek, frameless glass or acrylic panels to create a transparent divider wall. This solution can help to maintain an open and airy feel while still providing a physical separation between different areas of the room. You can further enhance the visual interest by playing with the positioning and arrangement of the panels, creating unique patterns and shapes.
If you’re feeling particularly adventurous, you could even explore the use of natural or living elements as part of your divider wall. This could involve incorporating a vertical garden, a living moss wall, or even a suspended plant installation. These biophilic design elements not only add visual interest but also contribute to the overall health and well-being of the space.
Ultimately, the key to creating a successful and visually compelling divider wall is to think outside the box and embrace your creativity. By exploring unconventional materials, techniques, and design approaches, you can transform a functional partition into a true work of art that enhances the overall aesthetic and experience of your space.
Other related posts from our website:
https://howtobuildahouseblog.com/room-dividers-smart-diy-and-creative-ideas-2/
https://howtobuildahouseblog.com/building-a-room-divider/
Thank you so much for your attention.
Stay tuned. We will upload many other amazing posts to our website and videos onto our YouTube channel.
Thank you so much.
for your time and attention.
Best Regards
See you to another post,
Bye, Bye


