Introduction
Painting a bathroom presents a unique set of challenges, with one of the most daunting areas being the space behind the toilet. The prospect of removing the toilet tank to achieve a seamless paint job can be both labor-intensive and fraught with the risk of plumbing issues, especially for those without experience. Fortunately, it is entirely possible to paint behind a toilet without the need to dismantle the tank. This comprehensive guide aims to walk you through each step of the process, ensuring you achieve a professional finish while avoiding any unnecessary plumbing mishaps.
Please, read our post and do not forget to check our YouTube channel “Grig Stamate”:
https://www.youtube.com/@GrigStamate
You will find there thousands of designing, furnishing, and decorating ideas for your home interior and outdoors.
Allow me to mention one of them:
The Most Beautiful Ideas for Your Wall Paint | Decorating with Colors #20 (video)
Whether you’re aiming to refresh your bathroom’s look with a new coat of paint or tackling a complete renovation, the area behind the toilet should not be overlooked. Proper preparation, the right tools, and strategic techniques are essential to navigate this tricky space effectively. By following the instructions laid out in this guide, you can ensure that the end result is both aesthetically pleasing and durable.
The primary goal is to provide you with a simplified, yet thorough method to paint behind your toilet. This approach not only saves time and effort but also maintains the integrity of your bathroom fixtures. From selecting the appropriate painting tools to mastering the application techniques, each aspect is covered to help you achieve a smooth and even coat of paint. So, let’s dive in and explore how you can successfully complete this task without the need for extensive plumbing knowledge or experience.
Gathering the Right Tools and Materials
Before embarking on the task of painting behind a toilet without removing the tank, it is imperative to gather all the necessary tools and materials. Proper preparation ensures not only efficiency but also a professional finish. The following items should be on hand:
Small Angled Paintbrush: A small, angled paintbrush is essential for reaching tight spots and providing precise control. This type of brush allows you to apply paint accurately around the contours of the toilet and other fixtures.
Mini Roller: A mini roller is perfect for covering larger areas quickly while still being compact enough to maneuver behind the toilet. Opt for one with a high-density foam cover for a smooth application, especially in confined spaces.
Painter’s Tape: Painter’s tape is crucial for protecting adjacent surfaces such as the toilet, floor, and walls. It ensures clean lines and prevents paint from seeping into unwanted areas.
Drop Cloths or Old Towels: To safeguard your flooring and other surfaces, use drop cloths or old towels. These will catch any accidental drips or spills, making the cleanup process much easier.
Paint Tray: A paint tray is a standard tool that holds the paint and allows you to load your brush or roller evenly. Choose one that fits comfortably in your workspace to avoid unnecessary spills.
Equally important is selecting the right type of paint for a bathroom environment. Given the high moisture levels in bathrooms, opting for paint with moisture resistance is crucial. Look for paints labeled as mildew-resistant or specifically formulated for high-humidity areas. These paints are designed to withstand the damp conditions commonly found in bathrooms, ensuring longevity and durability of your paint job.
Having these tools and materials ready will streamline the process and help achieve a professional-looking finish without the hassle of removing the toilet tank. Proper preparation is the key to a smooth and efficient painting experience.
Preparing the Area
Proper preparation is crucial for achieving a successful paint job, particularly when dealing with challenging areas such as behind a toilet. To ensure the paint adheres well and the final result looks professional, start by thoroughly cleaning the area. Dust, grime, and any residual moisture can prevent paint from sticking effectively. Use a mild detergent mixed with water to clean the wall behind the toilet. A sponge or cloth can help you reach tight spots, ensuring every inch is free from dirt. Allow the area to dry completely before moving on to the next steps.
Once the surface is clean and dry, the next step is to protect the toilet and surrounding areas from unwanted paint splatters. Painter’s tape is essential for this task. Carefully apply the tape along the edges of the toilet tank and any other fixtures that might come in contact with the paint. Make sure the tape is pressed down firmly to prevent paint from seeping underneath.
In addition to painter’s tape, drop cloths or plastic sheeting are vital for safeguarding the floor and any nearby fixtures. Spread the drop cloths around the base of the toilet and extend them to cover any adjacent areas that could be exposed to accidental drips or splashes. This not only protects the surfaces but also makes the cleanup process much easier once the painting is complete.
By investing time in thorough preparation, you set the stage for a smoother painting process. A clean, well-protected area allows you to focus on applying the paint evenly and efficiently, resulting in a more polished and professional finish. Ensuring these preliminary steps are done correctly will save you time and effort in the long run, making the entire painting project more manageable and less stressful.
Techniques for Reaching Tight Spaces
Painting behind a toilet presents a unique challenge due to the limited space and awkward angles. To achieve a smooth, even coat of paint without removing the tank, employing creative techniques is essential. One of the most effective methods involves using a small, angled brush. This specialized brush is designed to reach into tight corners and narrow gaps, making it ideal for this task. By angling the brush appropriately, you can apply paint precisely and avoid smudging adjacent areas.
Another useful tool for painting behind a toilet is a paint pad. Paint pads come in various sizes and are particularly useful for covering larger, flat surfaces quickly. They often have a thin, absorbent layer that holds paint well, allowing for even distribution with minimal dripping. When using a paint pad, gently press it against the wall behind the toilet and move it in smooth, controlled strokes. This technique helps to avoid uneven application and ensures a consistent finish.
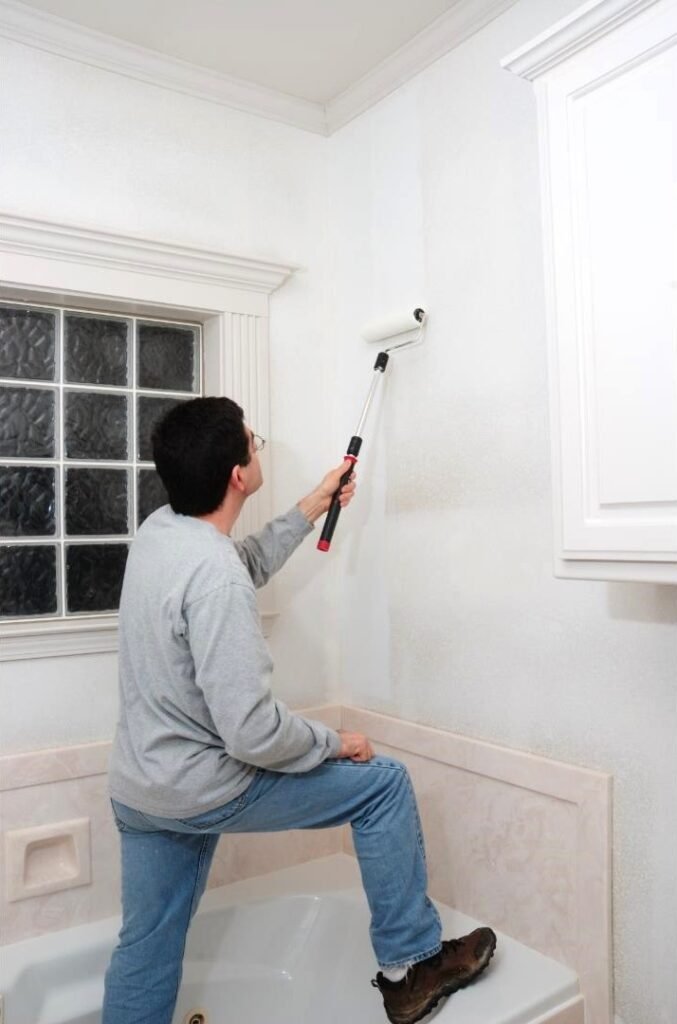
For those hard-to-reach areas where even a small brush or paint pad might struggle, consider using a small roller with a long handle. These rollers are designed to fit into tight spaces and can be maneuvered with relative ease. The long handle provides additional leverage, making it easier to reach behind the toilet without straining. When using a small roller, apply paint in vertical or horizontal strokes, depending on the orientation of the space, to ensure thorough coverage.
In addition to selecting the right tools, it’s important to prepare the area properly. Use painter’s tape to protect the edges of the toilet tank and surrounding fixtures from accidental paint smears. Laying down a drop cloth or old newspaper around the base of the toilet can also help catch any drips or splatters, keeping your bathroom floor clean. By combining these techniques with careful maneuvering, you can achieve a professional-looking paint job behind your toilet without the need for tank removal.
Using a Paint Shield or Special Tools
Painting behind a toilet can be a challenging task, especially if you are trying to avoid removing the tank. Fortunately, there are specialized tools that can make this job much easier. One such tool is a paint shield, which acts as a barrier to protect the areas you do not wish to paint. Another useful tool is a flexible extension handle for your roller, which provides greater reach and maneuverability in tight spaces.
To begin with, a paint shield is an excellent choice for achieving a clean line behind the toilet tank. This tool can be easily positioned behind the toilet, allowing you to paint the wall without getting any paint on the tank itself. Here’s a step-by-step guide on how to use a paint shield:
1. Position the Shield: Carefully place the paint shield behind the toilet tank. Ensure that it is snug against the wall to prevent any paint from seeping through.
2. Apply Paint: Using a small brush or a roller, apply paint to the wall area that is exposed by the shield. Be sure to use even strokes and adequate paint to achieve a smooth finish.
3. Move the Shield: As you complete one section, carefully slide the paint shield to the next area and repeat the process until the entire area behind the toilet is painted.
Alternatively, a flexible extension handle for your roller can also be highly effective. This tool allows you to reach difficult spots without contorting your body or removing the toilet tank. Here’s how to use it:
1. Attach the Extension: Securely attach the flexible extension handle to your roller.
2. Paint Behind the Tank: Extend the handle and carefully maneuver it behind the toilet tank. Apply paint evenly, ensuring that you cover all areas.
3. Check for Missed Spots: Once you have painted behind the tank, inspect the area for any missed spots and touch up as necessary.
Using a paint shield or a flexible extension handle can significantly simplify the task of painting behind a toilet, ensuring a professional and clean finish without the hassle of removing the tank.
Applying the Paint
With your area prepped and your tools ready, the next step is to begin the actual painting process. Start by loading your brush or roller with a modest amount of paint. It’s crucial to apply thin, even coats to avoid drips and ensure comprehensive coverage. Overloading your brush can lead to unsightly streaks and a longer drying time. Instead, dip just the tip of your brush or roller into the paint, gently tapping off any excess before making contact with the wall.
When painting behind a toilet, it’s essential to pay special attention to the corners and edges. These areas often pose the most challenges but also make a significant difference in achieving a professional finish. Use a small angled brush to carefully navigate these tight spots. Begin by painting along the edges, using smooth, steady strokes to create a seamless boundary. Once the edges are covered, you can use a mini roller to fill in the larger areas.
Work in sections, starting from the top and moving downward. This technique helps prevent accidental smudging and ensures that any drips can be smoothed out as you go. Remember to maintain a consistent pressure throughout the process. If you notice any areas that appear too thin or patchy, allow the first coat to dry completely before applying additional layers. This approach will help you achieve a more uniform and polished look.
Additionally, pay extra attention to the drying times recommended by the paint manufacturer. Rushing through the process can compromise the quality of your work. Proper ventilation is also essential to speed up drying and reduce the presence of fumes. Open windows and use fans to facilitate airflow.
By meticulously applying thin, even coats and taking care to handle corners and edges with precision, you can successfully paint behind a toilet without removing the tank, ensuring a flawless and professional result.
Drying and Applying Additional Coats
After successfully applying the first coat of paint behind the toilet, it is crucial to allow sufficient drying time before adding any additional layers. Bathroom paint generally requires a drying period of around 4 to 6 hours, although this can vary based on the paint type and the room’s humidity levels. Ensuring the paint is completely dry will not only improve adhesion for subsequent layers but also prevent any unwanted smudging or uneven texture.
To determine if another coat is necessary, closely inspect the painted area. Look for any inconsistencies in color or coverage, as well as any spots that may have been missed in the initial application. Utilizing a bright light or flashlight can be helpful in identifying these areas. If the initial coat appears patchy or thin, applying a second coat will enhance the overall finish and durability of the paint job.
When applying additional coats, follow the same method used for the first layer. Use a small brush or paint roller to ensure even application in the tight spaces behind the toilet. Pay particular attention to the edges and corners, where paint coverage may be less thorough. If necessary, use a mirror to check areas that are difficult to see directly.
Finally, allow the final coat to dry completely as well. This may take slightly longer than the first coat due to the increased paint thickness. Once the paint is dry, perform a final inspection to ensure a uniform appearance. Any small imperfections or missing spots can be touched up with a fine brush. By adhering to these guidelines, you can achieve a professional and polished finish behind your toilet without the need to remove the tank.
The final step in the painting process is the clean-up and any necessary touch-ups. After ensuring the paint is completely dry, it is crucial to carefully remove the painter’s tape to avoid damaging the fresh paint. Begin by gently pulling the tape back on itself at a 45-degree angle. This technique minimizes the risk of peeling off any paint along with the tape. If the tape does not come off easily, consider using a utility knife to score along the edge of the tape, which will help in achieving a clean line.
Next, focus on cleaning your brushes and rollers. For water-based paints, rinse the brushes and rollers under warm water until the water runs clear. Using a brush comb can help remove any remaining paint from the bristles. For oil-based paints, you will need to use a solvent such as mineral spirits or paint thinner. Soak the brushes and rollers in the solvent, then rinse them thoroughly with soap and water. Proper cleaning will extend the life of your painting tools and ensure they are ready for future projects.
Final touch-ups are essential to achieving a professional finish. Inspect the painted area for any imperfections, such as missed spots or uneven edges. Use a small brush to carefully touch up these areas. Feathering the edges of the touch-up spots will help to blend them seamlessly with the surrounding paint.
Maintaining your newly painted bathroom walls is also important. Regular cleaning with a mild detergent and a soft cloth will help preserve the fresh look. Avoid using abrasive cleaners or scrub brushes, as they can damage the paint.
By following these steps, you can ensure that your painting project behind the toilet results in a flawless finish. Proper clean-up and maintenance will keep your bathroom looking fresh and inviting for years to come.
Other related posts from our website:
https://howtobuildahouseblog.com/deck-painting-a-guide-to-achieving-a-weather-resistant-finish/
https://howtobuildahouseblog.com/posters-and-paintings-for-a-dark-wall-in-the-bedroom/
Thank you so much for your attention.
Stay tuned. We will upload many other amazing posts to our website and videos onto our YouTube channel.
Thank you so much.
for your time and attention.
Best Regards
See you to another post,
Bye, Bye


