Introduction to DIY Kitchen Furniture Restoration
Discover the rewarding journey of DIY kitchen furniture restoration. This blog post offers a comprehensive guide to revitalizing your kitchen space, covering essential steps from assessing the condition of your furniture to applying the final protective coatings. Learn how to save money, personalize your kitchen, and achieve professional-looking results with detailed instructions and maintenance tips.
Embarking on a DIY kitchen furniture restoration project can be a highly rewarding endeavor. It provides a unique opportunity to revitalize your kitchen space while also saving a significant amount of money. By taking on such a project, you can avoid the often hefty costs associated with purchasing new furniture or hiring professional services. Additionally, DIY restoration allows for a high level of personalization. You have complete control over the design, color, and finish, enabling you to tailor the furniture to perfectly match your taste and the overall aesthetic of your kitchen.
Please, read our post and do not forget to check our YouTube channel “Grig Stamate”:
https://www.youtube.com/@GrigStamate
You will find there, thousands of designing, furnishing, and decorating ideas for your home interior and outdoors.
Allow me to mention one of them:
Great Ideas for A Modern Kitchen | Interior Design Ideas #5 (video)
One of the most fulfilling aspects of DIY restoration is the sense of accomplishment that comes from completing a project with your own hands. The hands-on experience not only enhances your skills but also gives you a deeper appreciation for the furniture pieces that you restore. Common items that are ideal candidates for restoration include kitchen cabinets, tables, and chairs. Each of these pieces can undergo a transformation that breathes new life into them, making them both functional and visually appealing once again.
The process of restoring kitchen furniture typically involves several basic steps. First, you will need to assess the condition of the furniture to determine the extent of the work required. This is followed by cleaning and stripping the old finish, which prepares the surface for any repairs that may be needed. Once repairs are completed, sanding the surface ensures a smooth base for the new finish. Finally, you can apply paint, stain, or varnish to achieve the desired look. Each of these steps will be explored in greater detail in the subsequent sections of this blog post, providing you with a comprehensive guide to successfully restoring your kitchen furniture.
Preparing for the Restoration Project
Embarking on a do-it-yourself restoration project for kitchen furniture necessitates meticulous preparation. The initial step involves a thorough assessment of the current condition of the furniture. Examine each piece for signs of wear, such as scratches, dents, loose joints, and any structural damage. This evaluation will help you identify the necessary repairs and determine the scope of the project.
Once you have assessed the furniture, gather all the required tools and materials. Essential items include various grits of sandpaper, paint suitable for kitchen furniture, high-quality brushes or rollers, screws, and cleaning supplies like a mild detergent and a soft cloth. Having all materials on hand before starting ensures a seamless workflow and prevents unnecessary interruptions.
Safety precautions are paramount during any restoration project. It is crucial to use protective gear, including gloves, safety goggles, and a dust mask to shield yourself from potential hazards such as dust and fumes. Additionally, ensure that you are working in a well-ventilated area to reduce exposure to harmful chemicals and to maintain a comfortable environment.
Creating a clean and organized workspace is fundamental to the success of your project. Clear the area of any clutter and set up a designated space for each tool and material. This organization not only enhances efficiency but also minimizes the risk of accidents. Lay down protective coverings to prevent damage to flooring and other surfaces. Adequate lighting is also essential, as it allows you to see fine details and achieve a professional finish.
By carefully preparing for your restoration project, you lay a solid foundation for a successful and satisfying transformation of your kitchen furniture. Attention to detail in the preparatory phase will streamline the restoration process and contribute to superior results.
Step-by-Step Restoration Process
Restoring kitchen furniture can be a rewarding DIY project, transforming worn-out pieces into eye-catching focal points. To achieve professional-looking results, follow these detailed steps:
1. Removing Old Finishes
Start by removing any existing finishes from the furniture. Use a chemical stripper to dissolve old paint or varnish. Apply the stripper with a brush, let it sit for the recommended time, and then scrape it off with a putty knife. For stubborn areas, use steel wool or a scraper. Ensure you work in a well-ventilated area and wear protective gear.
2. Repairing Damage
Inspect the furniture for any damage. Fill small cracks and holes with wood filler, and let it dry completely. For loose joints, apply wood glue and clamp the pieces together until the glue sets. Sand down any excess filler for a smooth finish.
3. Sanding Surfaces
Once repairs are complete, sand all surfaces using medium-grit sandpaper to remove any remaining finish and smooth out imperfections. Follow up with fine-grit sandpaper for a silky-smooth base. Always sand in the direction of the wood grain to avoid scratches.
4. Applying Primer
Before painting, apply a primer to the sanded surfaces. Primer helps paint adhere better and provides an even base, especially important for previously finished or dark-colored furniture. Choose a primer suitable for your chosen paint type and apply it in thin, even coats.
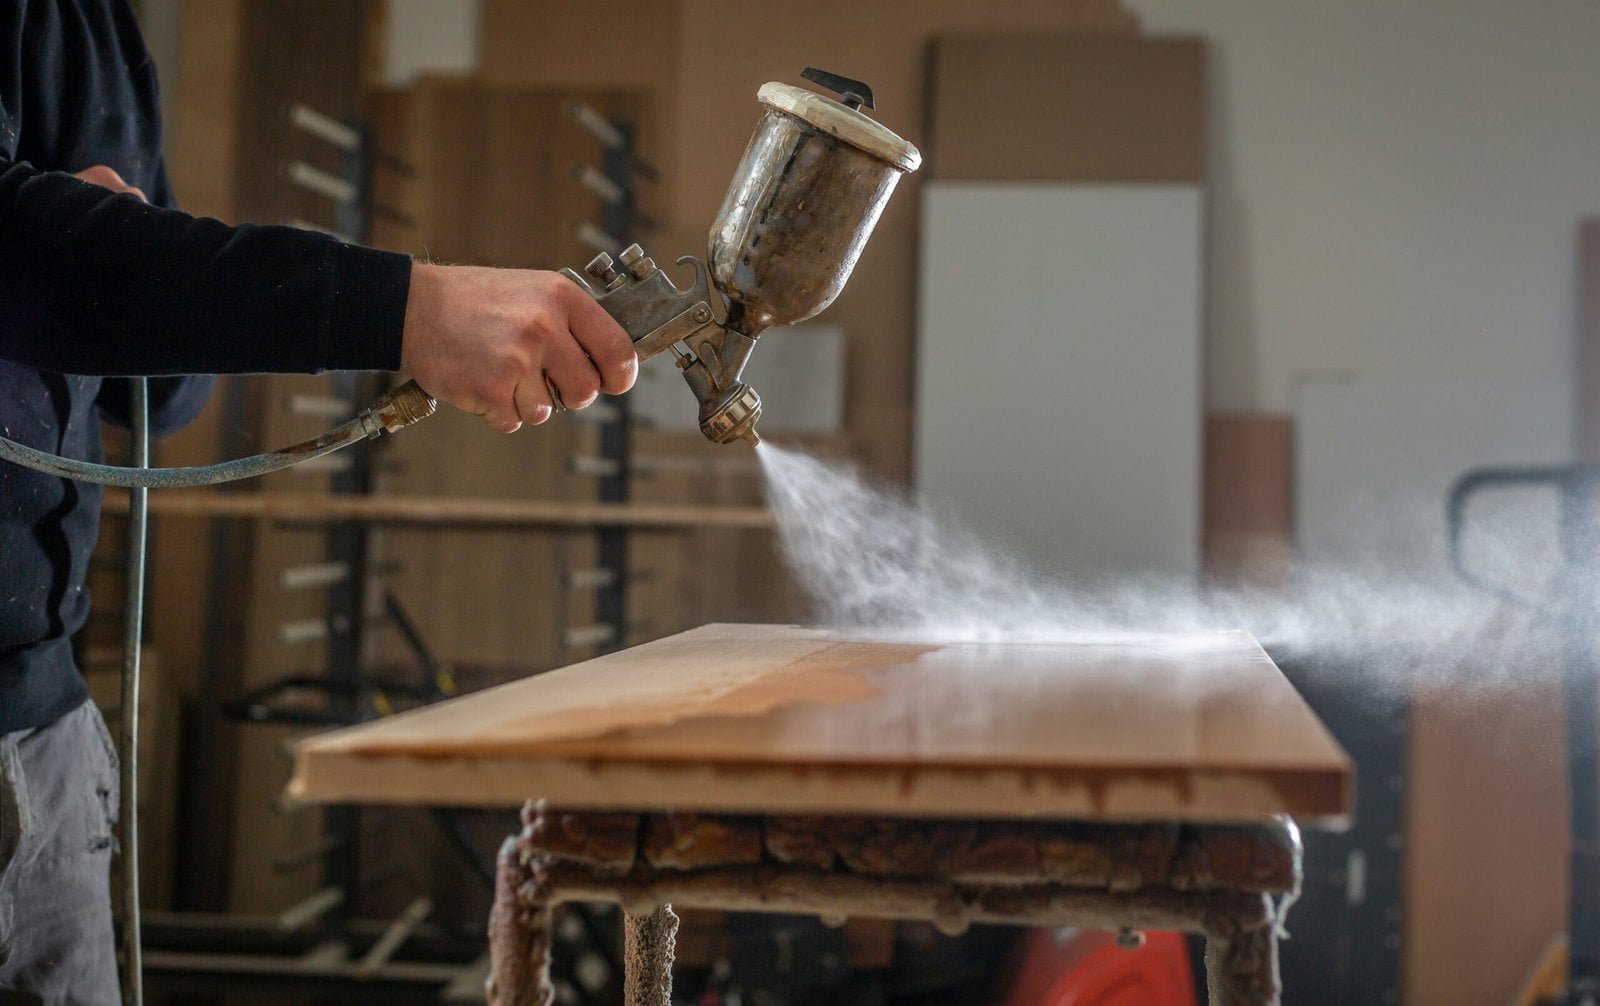
5. Painting or Varnishing
Once the primer is dry, apply your chosen paint or varnish. For paint, use a high-quality brush or roller, and apply multiple thin coats, allowing each to dry before adding the next. This prevents drips and ensures an even finish. For varnish, use a clean brush and follow the grain of the wood, applying at least two coats for durability.
Troubleshooting Common Issues
If you encounter stubborn stains, try a mixture of baking soda and water or a commercial wood cleaner. For loose joints that persist despite gluing, consider reinforcing with small brackets or screws. Uneven paint can be fixed by lightly sanding the affected area and applying another coat.
By following these steps and tips, you can achieve a professional-looking restoration of your kitchen furniture, breathing new life into your cherished pieces.
Finishing Touches and Maintenance Tips
Once the main restoration work on your kitchen furniture is complete, the next crucial step involves adding the finishing touches that will not only enhance the aesthetic appeal but also ensure the longevity of your efforts. Start by considering new hardware: replacing old, worn-out knobs, handles, and hinges with modern, stylish options can significantly transform the look of your furniture. When selecting new hardware, choose pieces that complement the style and color of your restored furniture to create a cohesive appearance.
Beyond hardware, decorative elements such as stencils, decals, or custom paint designs can add a unique touch to your kitchen furniture. These personal touches can reflect your style and give your kitchen a bespoke feel. For a more polished look, consider adding trim or molding to the edges of furniture pieces.
To protect your restored furniture and maintain its new look, applying a protective coating is essential. Options include clear polyurethane, lacquer, or wax, depending on the finish you desire. These coatings act as a shield against moisture, heat, and daily wear and tear, thereby prolonging the life of your restored pieces.
Maintenance is key to keeping your kitchen furniture looking fresh and new over time. Establish a regular cleaning routine that includes dusting and wiping down surfaces with a damp cloth. Avoid using abrasive cleaners that can damage the finish. Periodic touch-ups, such as reapplying protective coatings or addressing minor scratches and dents, will help maintain the integrity of your furniture.
Finally, don’t hesitate to showcase your finished projects and share your experiences with the DIY restoration community. Sharing before-and-after photos and detailing your process can provide inspiration and encouragement to others embarking on similar projects. Engaging with a community of fellow DIY enthusiasts can also offer valuable feedback and new ideas for future endeavors.
Other related posts from our website:
https://howtobuildahouseblog.com/coloured-oil-paint-can-freshen-kitchen-cabinets/
Thank you so much for your attention.
Stay tuned. We will upload many other amazing posts to our website and videos onto our YouTube channel.
Thank you so much.
for your time and attention.
Best Regards
See you to another post,
Bye, Bye


No Responses