First, you should know that flat roof is improperly called flat, because a flat roof is not really, flat. Any flat roof is built slightly inclined to ensure the water runoff. However, a flat roof is not logical architectural. Although it is slightly tilted, a flat roof allows water, ice or snow to settle causing infiltrations and leakages.
Nevertheless flat roofs are very popular and have a growing requirement in many industrial, commercial or residential applications. There are two main reasons why these flat roof systems are so popular.
They are not so expensive as slopped roofs and they have a great aesthetically look. In fact, they have a great visual impact reflecting reflecting through their lines the horizontal lines of the surrounding environment.
Installation of a Flat Roof
1. Roof Framing:

As it was mentioned above, flat roofs are slightly sloping. This prevents in a way, water to pool and eventually, to leak inside the house.
It is recommended that the slope of a flat roof to be 1.8-inch/ foot. Generally, a flat roof consists of several slopes toward the roof scupper holes, which are connected to downspouts. On larger roofs, these slopes are realized from the underlayment foam.
However, it is a bit more complicated for small flat roofs. The roof slope is achieved by cutting the 2x4s foam underlayment sheets into long stripes and nailing them to the joists. To create the inclined surface of the roof, they are large and close together.
2. Sheathe with Plywood:
Above the roof framing comes plywood sheathing (5/8-inch thick). These plywood sheathing is nailed down on the roof frame. There are recommended 1/8-inch gaps between plywood sheathings to allow any contraction or expansion of these sheathings.
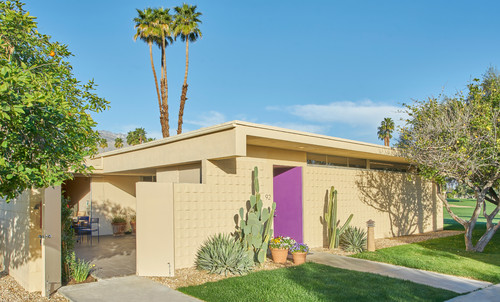
Photo by RDK Design – More exterior home ideas
3. Underlayment Installation:
Before installing the sheet-rubber, it is necessary the installation of a substrate named ISO-board. ISO-board is a rigid foam (1/2-inch thick) made from polysocyanurate with fiberglass backing.
Installation of the ISO-boards is very simple. It can be easily cut with a utility knife and anchor to the 5/8-inch plywood sheathing, using screws and galvanized steel washers.
No need to let spaces between ISO-boards since this foam material does not contract or expand. In fact, you should install these pieces very tight, one against another.
Roofing Contractors & The New State Laws (howtobuildahouseblog.com)
4. Create Beveled Corners:
There are many cases when your flat roof is bordered on two sides by walls of neighboring buildings that create an interior corner of the roof surface.
These inside corners can be very tricky. You need to keep water away from pooling of these inside corners. This can be done ripping 2x4s lengthwise on a 45-degree bevel with a saw. You can create a gradual transition screwing these strips into the joint between the walls and your roof.
5. Dry-Fit the Roofing:
Before installing the rubber material, you should remove any dirt and debris. This debris could puncture your new roof. Therefore, it is necessary to clean thoroughly the surface of the roof.
After that you can lay down EPDM (ethylene propylene diene monomer). These membranes come in rolls (usually 10-foot wide).
For small roofs, you can use only a roll of EPDM. It is not necessary to overlap EPDM pieces. For larger roofs, you need more than one sheet of EPDM. You should overlap these sheet pieces 6 inches without gluing them. You need to glue the seams when you reach the end of the roof.
If you need to install a vent stack on the roof then you need to make a hole into the EPDM membrane. Make this hole a bit larger than the vent pipe and slide down the rubber over it.
6. Glue Down the Rubber:
Spread the glue over the ISO-board area. Use for that a paint roller and an extension pole.
Allow time glue to dry and after that spread carefully the rubber sheet over the ISO-board, pushing the membrane gently toward to prevent any wrinkles. You should work very carefully without picking up this rubber, because otherwise it will stretch and spring back making it to lay down in an unequal layer.
Also, you should work in small sections smoothing out the air bubbles. Use for this a dry paint roller.
The next step is the gluing of the seams, but before that, you should clean the seams using a specific solvent. Then you need to apply a special adhesive (black rubber o rubber). Be extremely careful. You need to know that seams are extremely vulnerable.
For the vent stacks you need a rubber collar around the vent pipe, gluing then, this collar to the EPDM membrane. Seal the collar with glue strips and a caulk it with tri-polymer caulking.
7. Finish the Edges:
When you have vertical corners, you need to cut and overlap the EPDM membrane. Glue this membrane down with rubber adhesive. Fix the vertical pieces of EPDM on the walls using metal brackets and screws. That will prevent the EPDM to peel off. Seal the brackets with tri-polymer caulking.
You have two alternatives for finishing the edges.
1. Lead-coated flashing over the edge of your roof.
2. Galvanized drip edge.
Finishing the edges is the last step of installing a flat roof and now your roof can stand against the weather elements.


