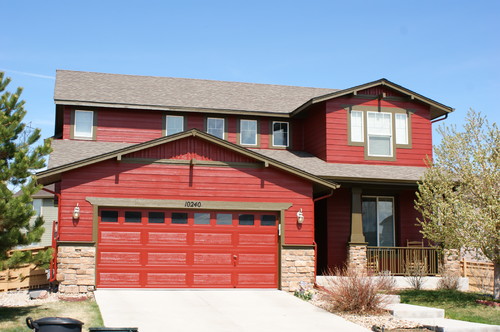
Painting the whole outside of your house is a major decision and a big job. But one of the quickest and most cost effective ways to upgrade the value and appearance of a home is by painting it.

Photo by CertaPro Painters of North Denver – Browse exterior home photos
Summer is best season for home renovations because it is hot and freshly painted walls dry faster. Ideally, exterior painting should be done when the temperature is between 10°C/50°F and 30°C/90°F and when there is little or no wind. These are the conditions that will provide good film formation.
The task of painting the exteriors of your house is much more complicated than carrying out the project indoors. This is because exterior surfaces are very much prone to dirt, dust and mildew. The task is time consuming, because you need to work on at least three different kinds of surfaces, wood, masonry and metal.
Preparing the Surface:
You’ll need to clean and prep the surface, decide what type of paint to use, and apply the paint. The biggest mistake most consumers make is not preparing the surface properly.
a) Power washing is the most effective way of cleaning exterior surfaces of dirt and chalk.
b) Or, you can use a mixture of soap and water with a scrub brush.
c) For mildew removal, use a diluted bleach solution.
Flaking or peeling paint should be removed by scraping, sanding or wire brushing.
Brick House – Exterior Painting Tips and Ideas (howtobuildahouseblog.com)
Required Tools:
You can achieve the best results if you have good quality tools. You need:
High-pressure water sprayer; paint scraper; brush/spray machine; sandpaper; waterproof caulk; paint roller; drop cloth; brushes; painter tape; ladder; painter scaffolding; eye protection gear.
a) If you are working with latex paint, use brushes and rollers made of synthetic materials.
b) If you are working with oil-based paints, use natural fibers.
Buying the Right Paint:
After surface preparation choosing the right quality of paint is essential. Good paint dries quickly. If you think you may have an inferior paint, first experiment on an inconspicuous portion of the house.
a) One of the top quality paint is acrylic latex paint which has superior adhesion and flexibility.
b) If you are painting over multiple (more than three or four) coats of oil-based paint, another coat of top quality oil-based paint is probably the best choice. Oil- based paint is a good choice for chalky surfaces.
How to Proceed:
Remove all the lighting fixtures, electrical covers and screens of the windows from the exteriors.
Check the wood and masonry for any damage and repair them, if any.
Protect the plants, bushes, flowerbeds, decks and sidewalks. Cover them with drop cloths.
Remove cracking paint, dirt, mildew and green algae from the exteriors. Use a high-pressure water sprayer to wash the surfaces thoroughly.
Allow time for the surfaces to dry completely.
Scrape off the blistered paint and debris, using a paint scraper.
Sand the dry surface with the help of sandpaper.
Fill the gaps and seal the nail or screw holes and cracks between the joints of the window trim, seams and corners, using a high-grade exterior waterproof caulk.
Use a blocking primer to cover the old paint stains or mildew stains.
You need to sand the walls again.
Paint the surfaces with primer. You should know that different surfaces (metal; wood, stucco) require different primers.
When the primer is dried completely, apply two to three coats of the exterior paint. Leave a gap of 24 hours between each coat
Tips:
a) To calculate how much paint you need multiply the width by height of each wall surface and you get square meters. On the paint cans is written how much surface you can cover with their content.
b) Paint is applied with uniform rolling motion up and down roller. Be careful not to press too hard wall roller to paint does not leak.
c) New paint can run and sag into a series of slack, skin like droops. This occurs when the paint you are using is too thick and forms a surface film over the still-liquid paint below. It can also happen if you paint in cold weather; the cold surface slows drying underneath. To re-coat, make sure the new paint is the proper consistency and be sure to brush it out as you apply. Before doing this, though, you will have to sand the wrinkled area smooth and, if necessary, remove the paint altogether.
d) Make use of the most appropriate painting tools. Paint the woodwork using brush or spray machine and make use of a paint roller for other surfaces.
e) Using a paintbrush incorrectly (e.g., too much paint on the brush) can create a wavy, irregular surface. To correct it after the paint is dry, sand and repaint surface, smoothing out the new coat to an even thickness.
f) Wear eye protection gear while removing the flaking paint, so that your eyes receive protection from the dust.
g) Do not paint on the hottest hours of a day.
Whether your house is in need of an upgrade or a refreshing appeal, a fresh coat of paint is your solution. Following these steps you can achieve great results.


