The first thing the homeowner should consider when building a patio, carport, outside storage shed is the concrete slab. Pouring a concrete slab is labor intensive, so it is best to get two or three of your friends to help out. Concrete dries rather quickly and must be in place and leveled within an hour or so of pouring.
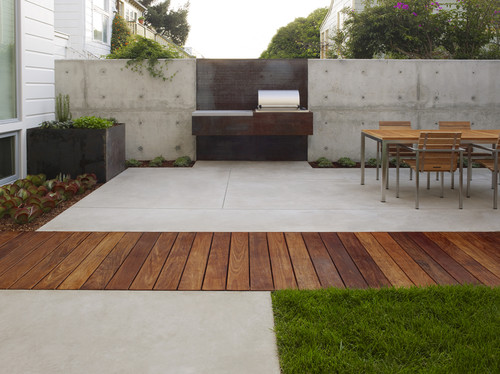
Photo by Field Landscape Architecture – Browse patio ideas
A concrete slab is poured right on the ground. It doesn’t have a foundation or any concrete walls under it or around it.
Preparation is very important in getting your site all set to pour a good concrete slab and the most important is the sub-grade preparation.
If you don’t start with a good base the concrete will probably settle and crack.
Tools and Materials:
– Hammer; Wooden stakes; Wheel barrow; Concrete rake; Pea gravel
– 2” X 4” stud; Shovels; Steel Wire Mesh for smaller projects, rebar for larger projects
– Building code recommended vapor barrier material (plastic water barrier)
– Level gauge; Work gloves; Tie wire; Side cutting pliers; Chalk line
*** There are a number of things needed to be put in place before pouring the concrete.
1/ Use a chalk line tool to mark off the area where the concrete is to be poured. Put in 4, temporary marking stakes to spot all the 4 areas of the hoof marks of the slab. Once the boundaries are marked off, begin digging the outer boundaries of the slab.
2/ After establishing the boundaries, begin digging from the center to the boundary markers. If you don’t have good gravel base dig out the “bad” dirt and replace with good pea or crushed gravel. You should go as deep as the frost line in your area.
3/ If there is any plumbing involved with the slab, consider it in the concrete slab design. The same goes for any electrical conduit supplied to the slab.
4/ Pour enough pea gravel to go an inch in depth. Compact or roll the gravel to prevent the slab from sinking. Level the pea gravel using your level.
5/ Some building codes require that a vapor barrier be placed under on the dirt prior to pouring the slab. Cut the plastic moisture barrier to cover the entire form except the wooden barriers. Lay the plastic over the pea gravel.
6/ Next, use 1/8-inch wire mesh (rebar for larger projects; consult the local building code) to cover the form except for the wooden barriers. Wire it together with the pliers at the intersections using tie wire. Use bolt cutters to cut any excess wire that hangs over the form.
7/ Home improvement outlets and tool rental facilities rent out portable cement mixers. This is the way to go for any patio or small shed project. Or you can use your wheel barrow to mix concrete manually. Add water per the instructions on the bag. Use your hoe to mix the water and concrete until all powder is mixed with water and all lumps removed. Use the concrete rake, if necessary, to combine the concrete with water.
8/ Pour the concrete mix into the footer, and spread it with your long-handle trowel. After filling the form, level it with the edge of the 2” X 4” stud. Push and pull it in a sawing motion across the form top starting at one end and working down to the other end. This process is called the ”screed”. Allow the form to dry for about an hour before walking on it. The concrete has to cure before that can happen.
Glass-Fiber Reinforced Concrete Tips and Ideas (howtobuildahouseblog.com)


